How to Do Event Tagging in First-Person Video Data
Discover why raw first-person footage isn't enough to train robots. Learn what event tagging is, why egocentric video is crucial for manipulation tasks, and follow a 9-step guide to annotate robot training data accurately using Labellerr.

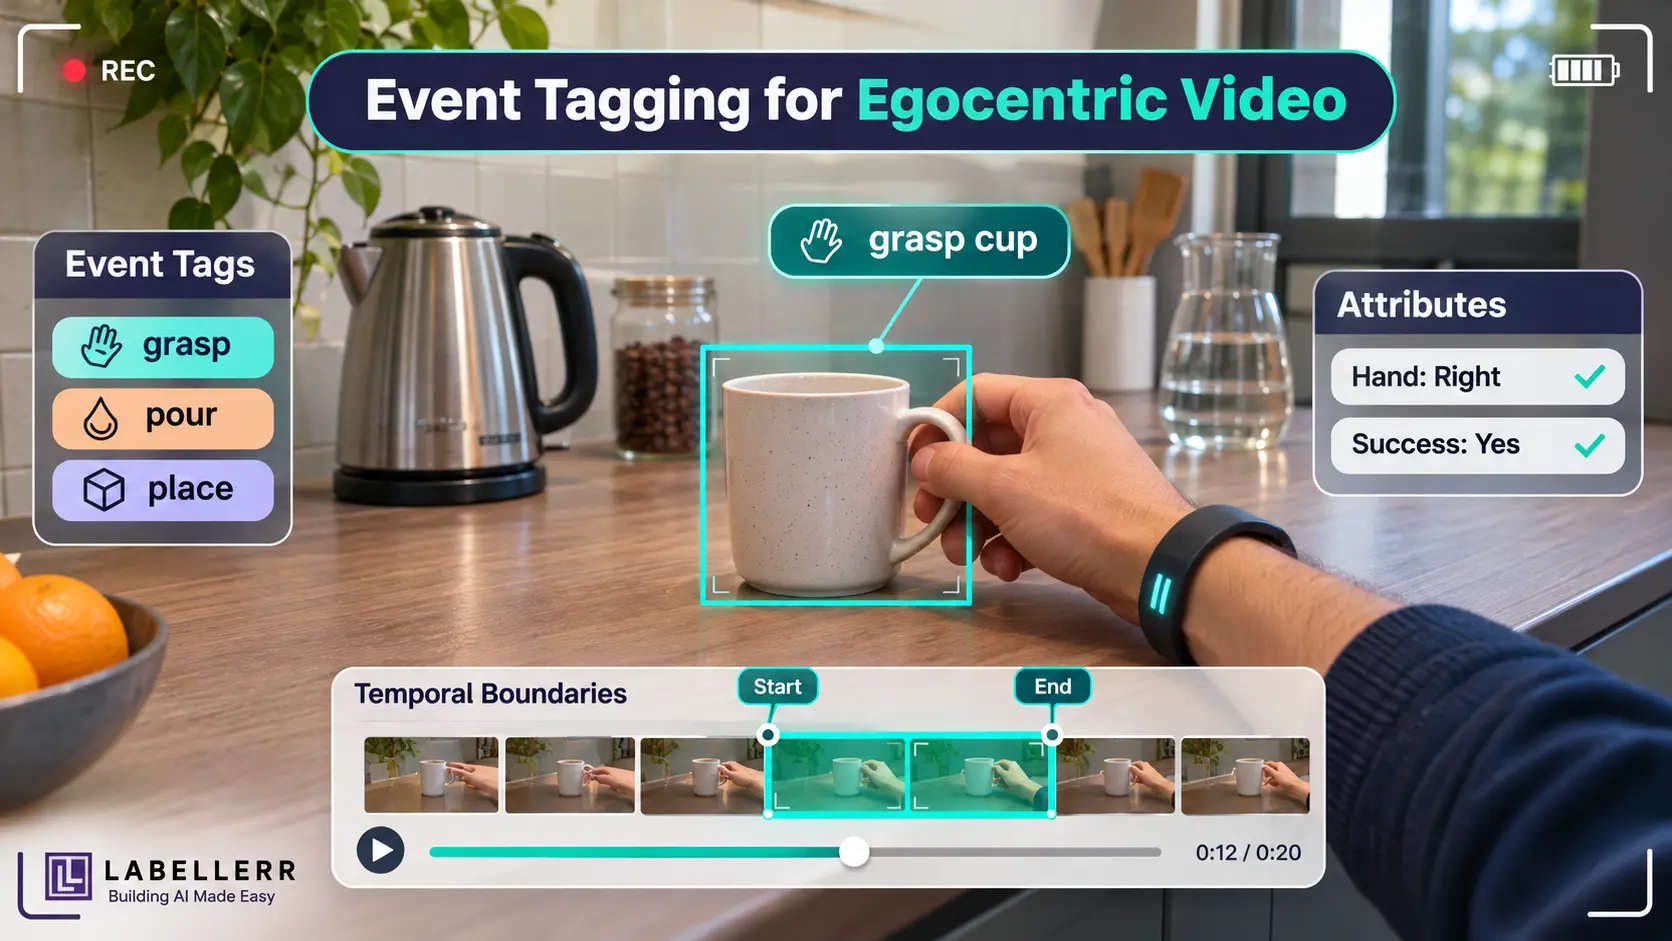
A robot cannot learn to load a dishwasher by watching ten hours of unlabeled footage. It needs to know exactly when the hand reaches, when it grasps, and when it lets go.
That is the job of event tagging, and the need for it is growing quickly because robotics teams now collect first-person video at enormous scale. Forbes reported in October 2026 that one startup, Maxinsights, has captured over 2 million hours of footage from more than 5,000 camera-wearing contractors.
Raw video at that scale remains useless until someone marks what happens and when it happens. This guide explains what event tagging is, why egocentric robotics depends on it, and how to do it in Labellerr in seven steps.
What Is Event Tagging?
Event tagging is the process of marking segments on a video timeline that match specific events or actions. Each tag stores a start time, an end time, a label and optional custom attributes.
You may also see it called action tagging, action labeling or temporal annotation. The principle is identical in every case, because each method converts a long, unstructured video into structured, searchable data.
For example, a 30-second kitchen clip might hold three tags: "pick up cup" from 0:02 to 0:05, "pour water" from 0:06 to 0:14, and "place cup" from 0:15 to 0:18.
How Event Tagging Works: The Architecture
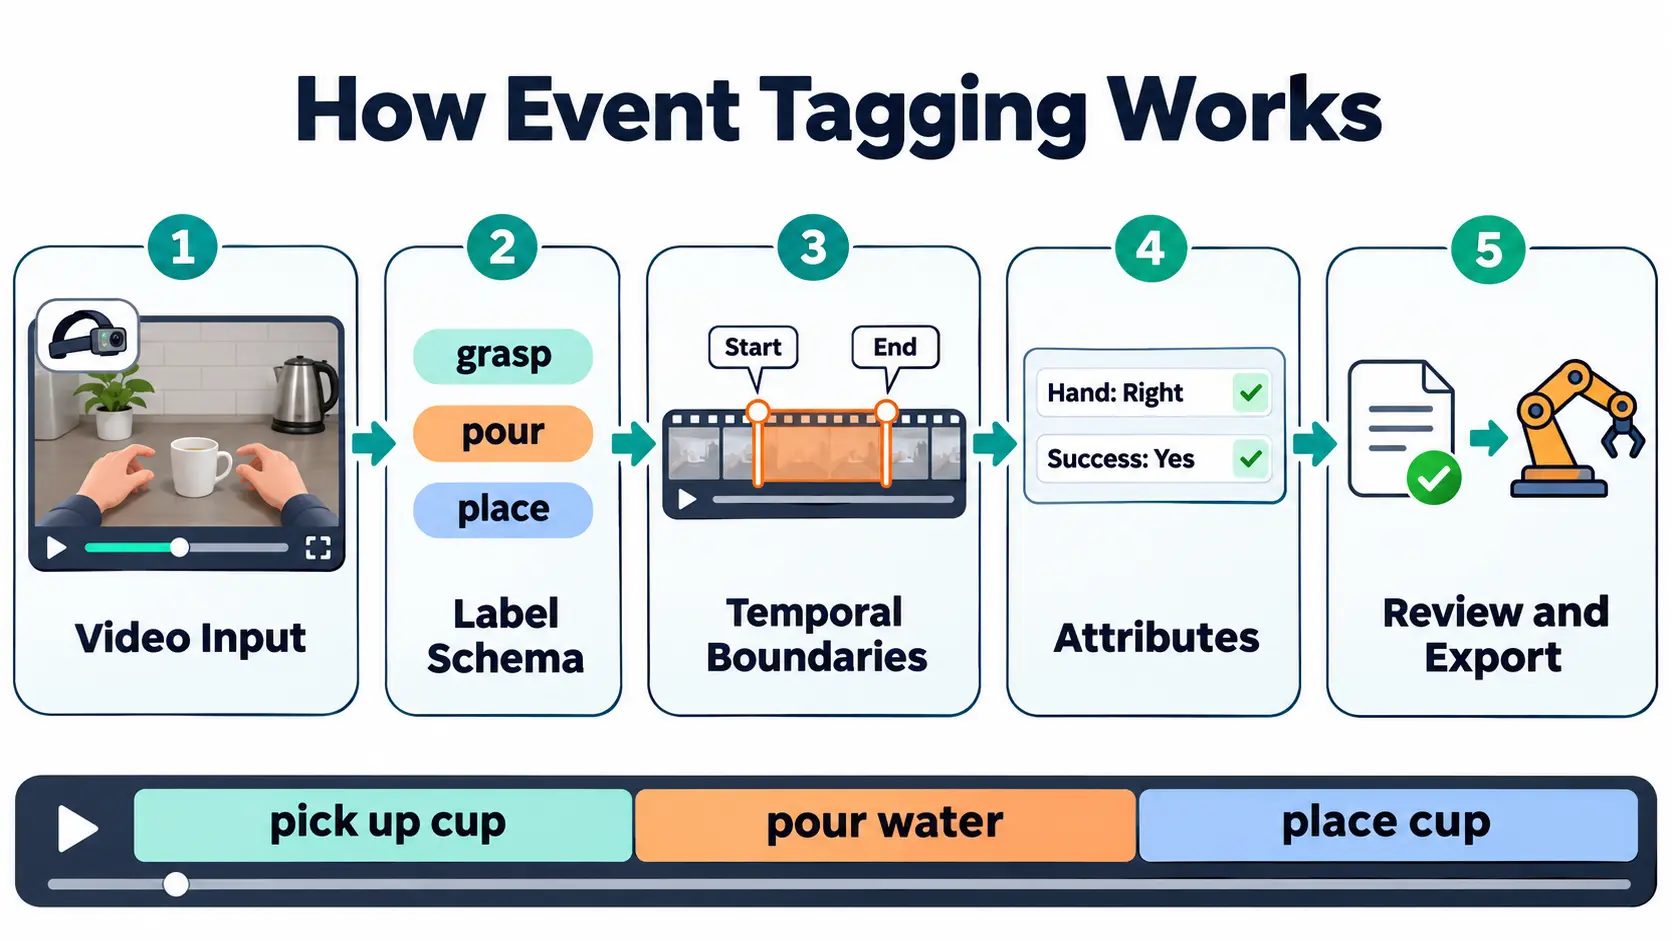
An event tagging pipeline has five connected parts, and each part feeds the next one.
Overview
1. Video input - Raw egocentric footage arrives from head, chest or wrist cameras, and each video is loaded onto a frame-accurate timeline.
2. Label schema - The team defines the event classes before any annotation begins. In robotics, classes often follow a verb and object pattern, such as "grasp bottle" or "open drawer."
3. Temporal boundaries - The annotator marks the first and last frame of each event, which turns a vague moment into a precise, measurable segment.
4. Attributes - Extra fields add detail to each event, such as which hand was used or whether the action succeeded.
5. Review and export - Reviewers verify the boundaries and labels, and the approved tags become structured training data for a machine learning model.
Together, these parts convert pixels into a sequence of labeled actions that a robot learning model can follow step by step.
Why Event Tagging Matters for Egocentric Robotics
Egocentric video shows the world from the eyes of the person doing the task. That perspective closely matches what a robot's own cameras see, which makes it valuable training data for manipulation tasks.
Recent research supports this approach. EgoVerse, a 2026 dataset from Georgia Tech, Stanford, ETH Zurich and partners, contains 1,362 hours of egocentric video across 1,965 tasks. Adding its human data to robot training improved task performance by up to 30%.
Scale matters as well. In the HumanNet study from Peking University, a model pretrained on 1,000 hours of egocentric video matched one pretrained on 100 hours of real robot data. Human video is also far cheaper to collect than teleoperated robot demonstrations.
However, video alone does not teach a robot anything useful. The model needs timed labels that connect each moment to a specific action. EgoVerse, for instance, includes fine-grained language descriptions every one to two seconds.
Event tagging supports robot learning in three ways:
- Task breakdown: Long tasks split into short, learnable steps such as approach, grasp, transport and release.
- Language grounding: Each segment pairs with a text label, which vision-language-action models need for training.
- Failure learning: Attributes can mark failed attempts, so the model learns what a mistake looks like.
How to Do Event Tagging in Labellerr: 9 Steps
Labellerr provides event tagging directly on the video timeline. Here is the complete workflow, based on the official Labellerr documentation.
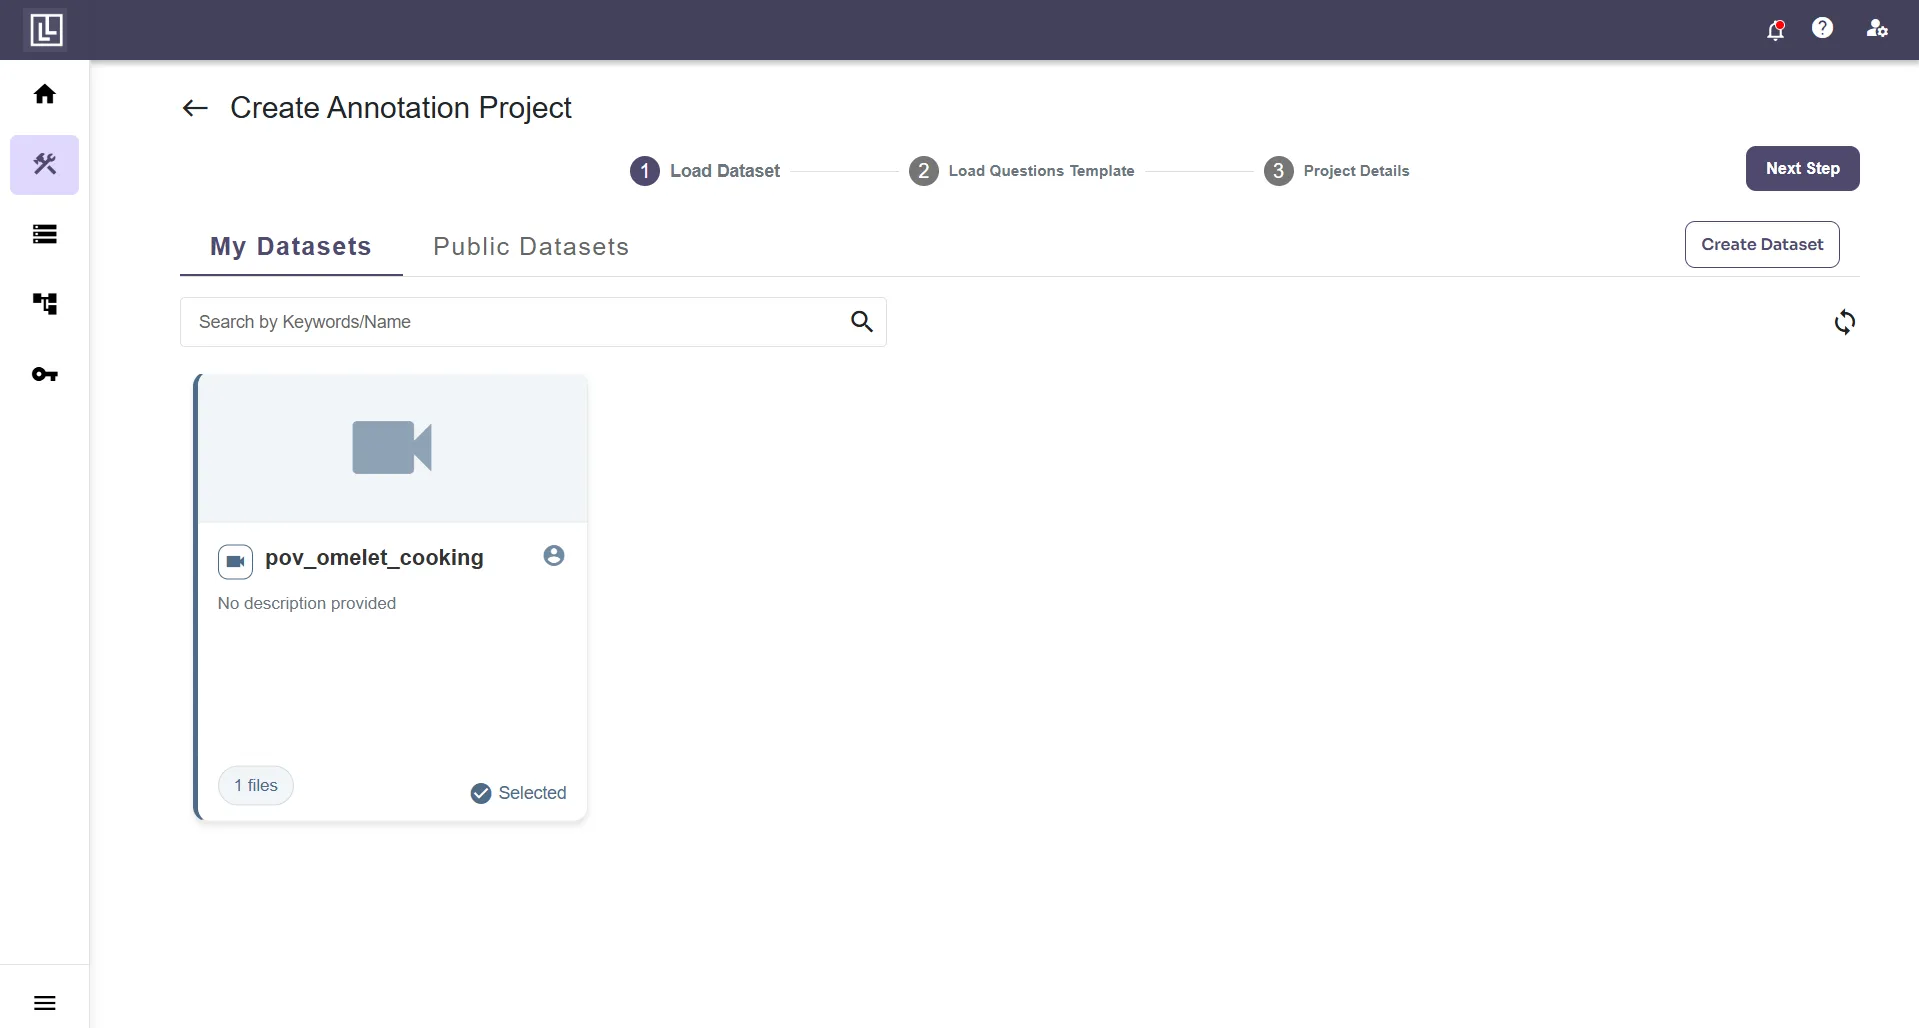
1. Create a Video Annotation Project
Start by creating a new video annotation project in Labellerr, then add your egocentric videos as the dataset.
Create a Video Annotation Project
2. Create an Annotation Template
Next, build an annotation template that uses the "event" object type. Add one class for each action you want to capture, such as "grasp," "pour" or "place."
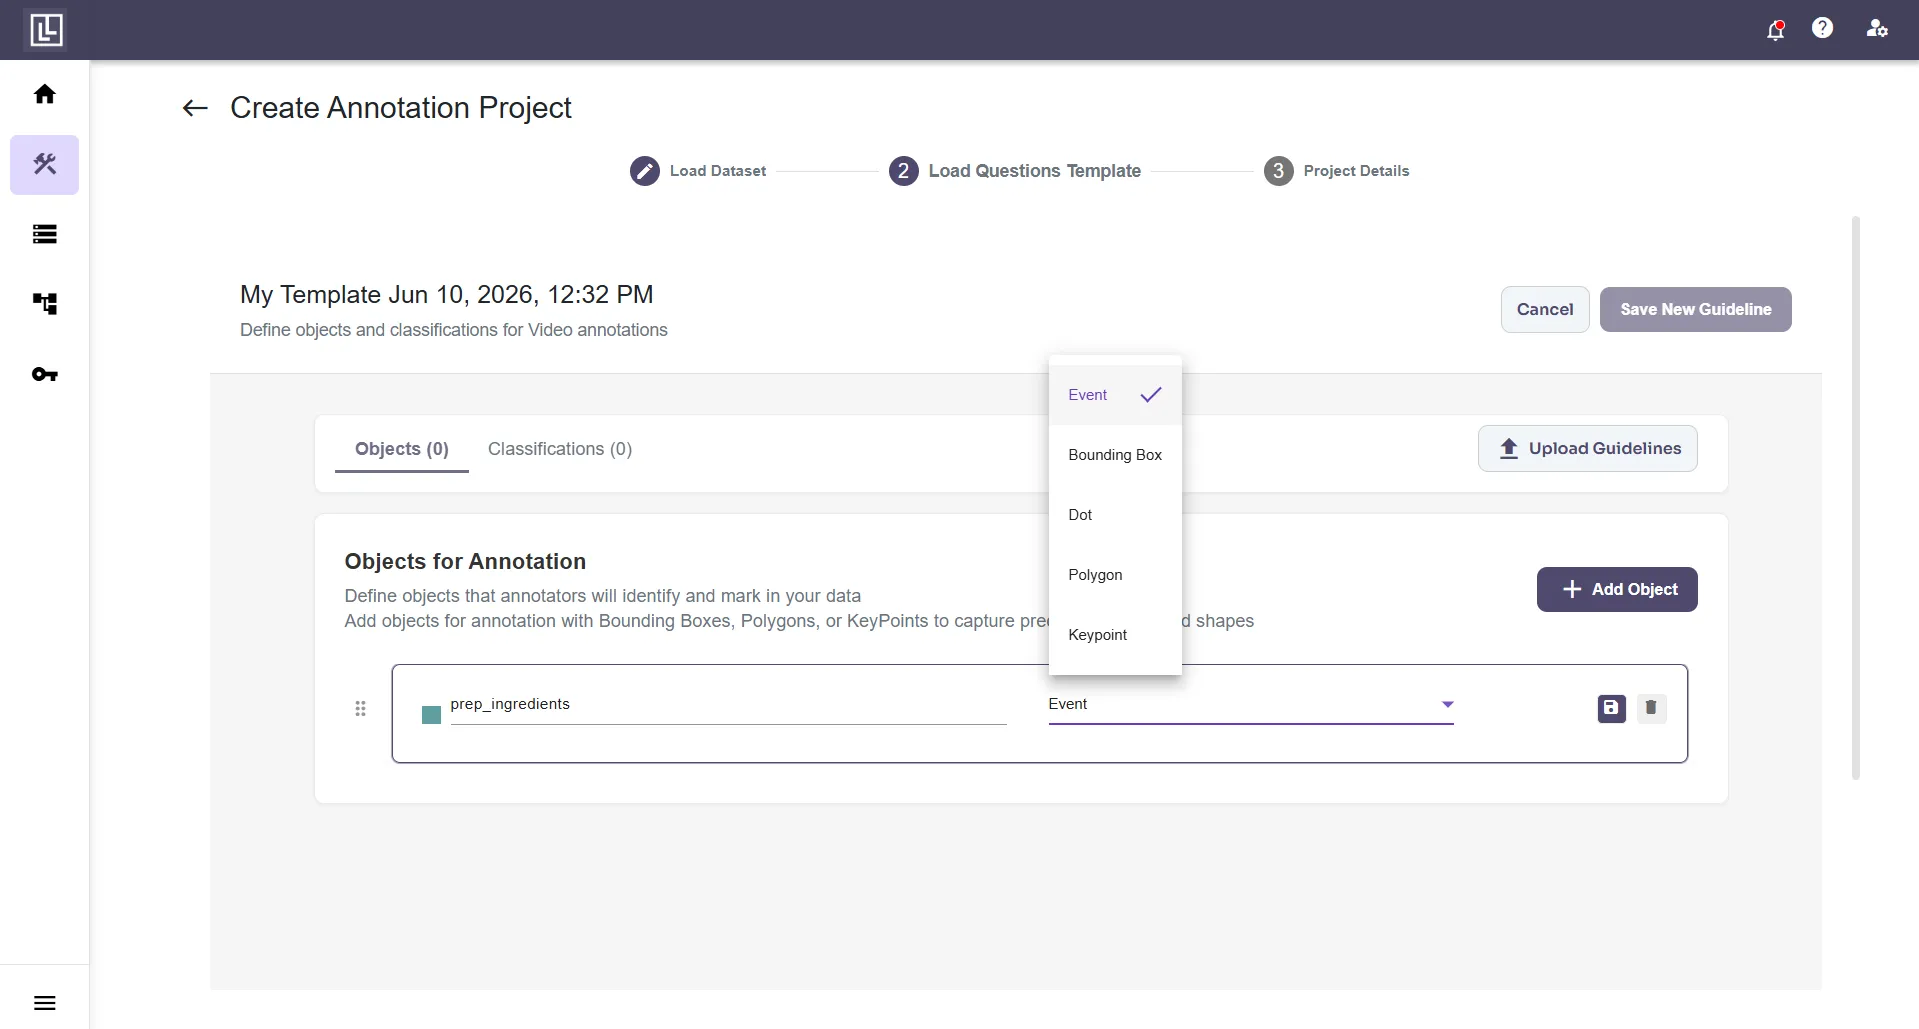
Create an Annotation Template
3. Add an Event on the Timeline
Open a video and play it to the moment an action begins. Add the event directly on the timeline at that frame, which sets its starting point.
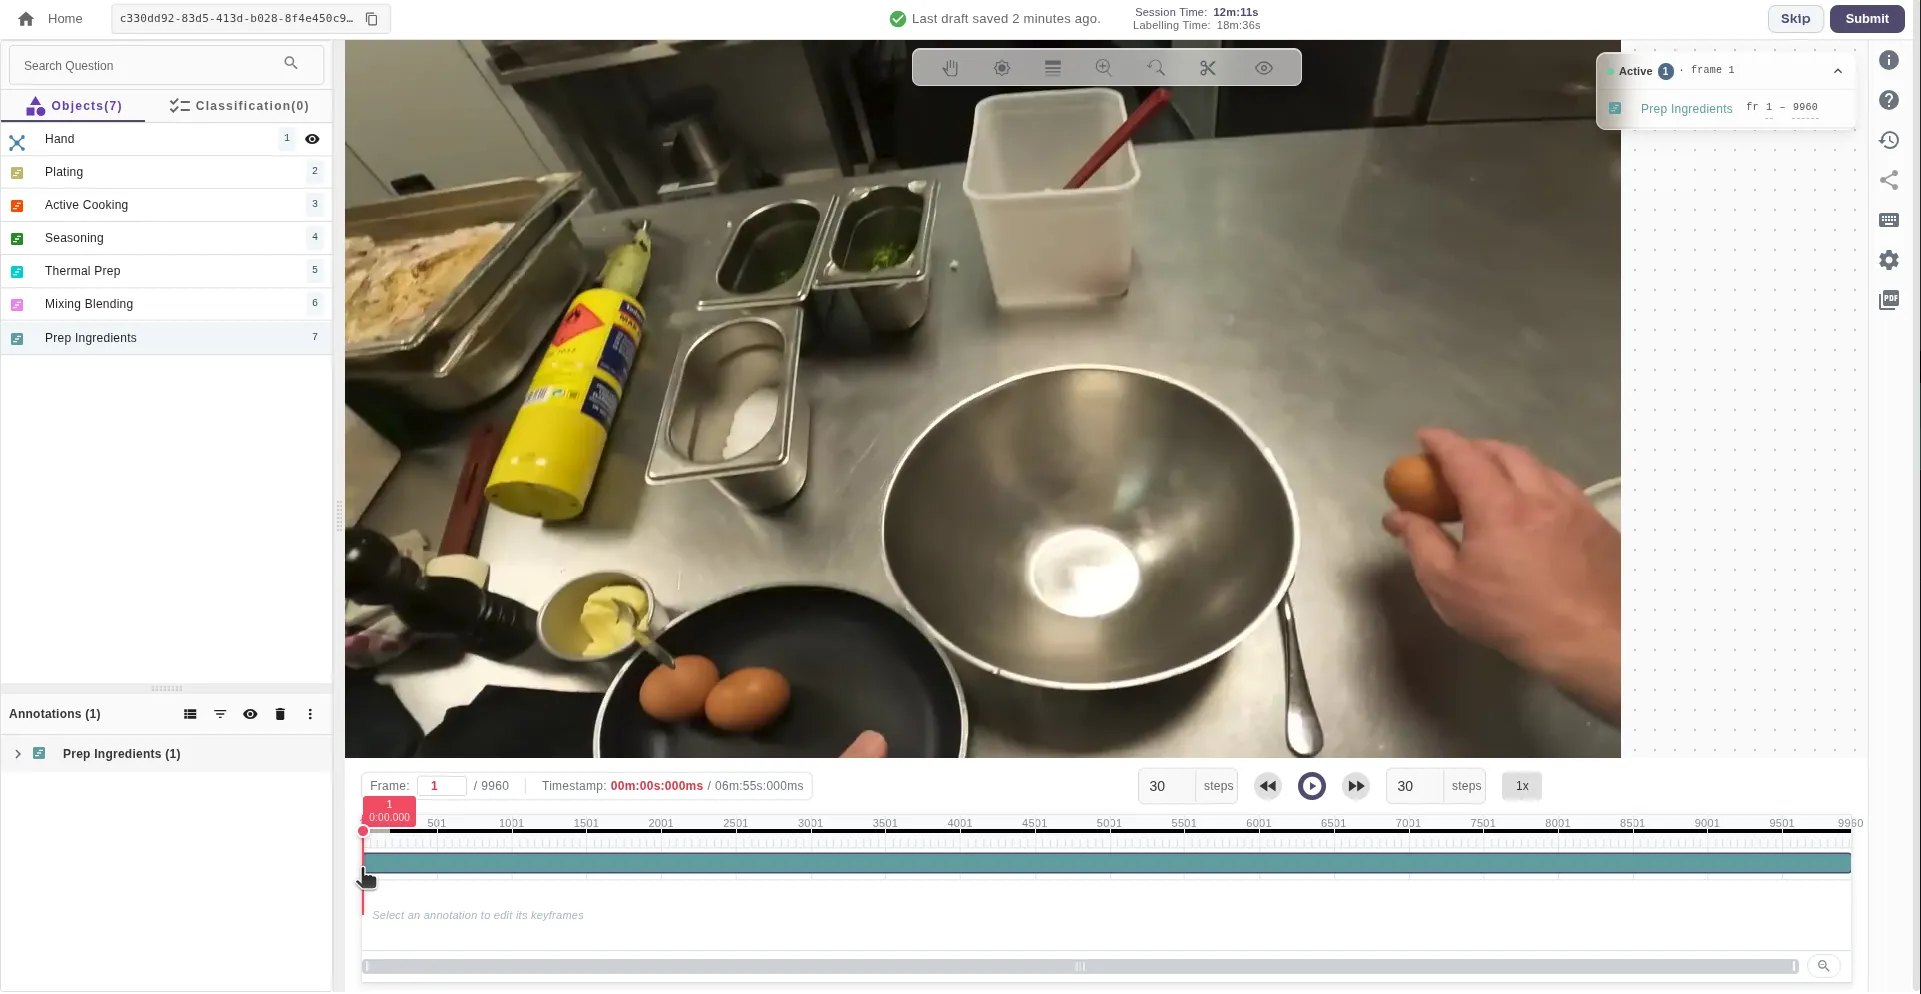
Add Event on the Timeline
4. Double-Click the Event
Double-click the event on the timeline, which tells Labellerr that you are ready to define the final frame of that event.
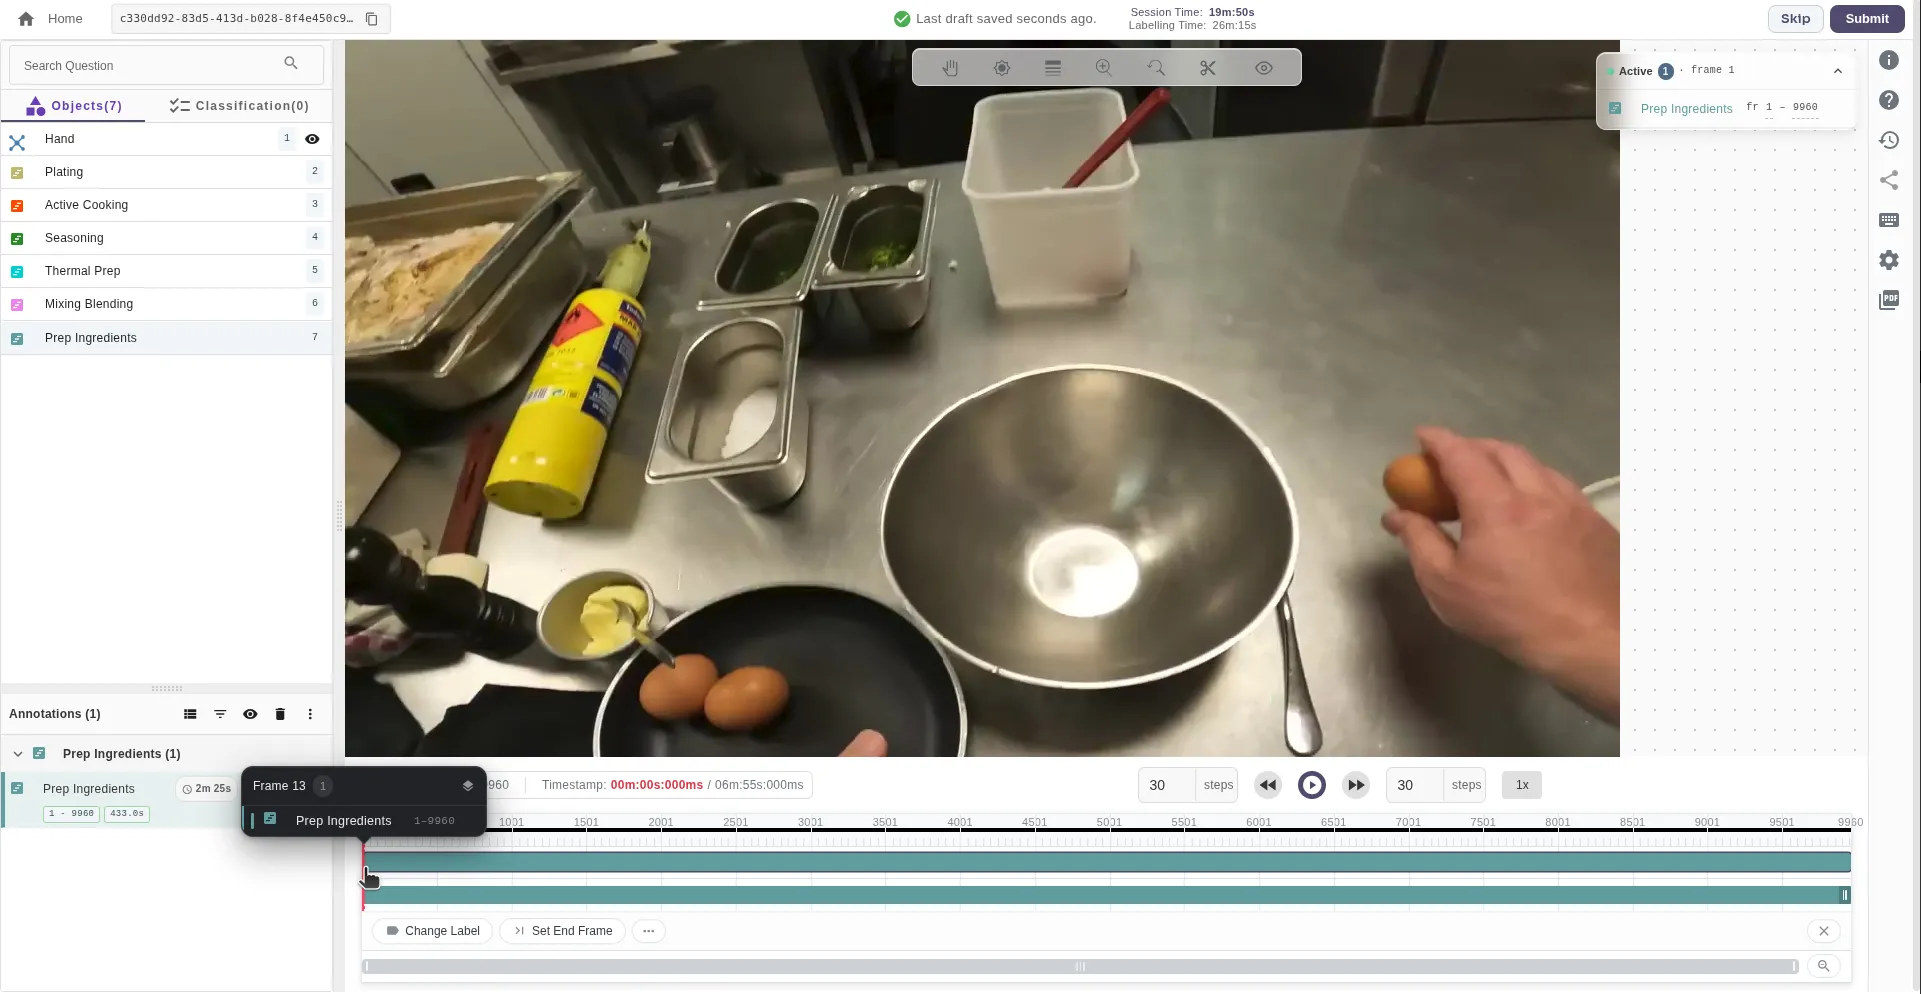
Double-Click the Event to Set Its Last Frame
5. Set the End Frame
Move to the final frame of the action, then click the Set End Frame button. In egocentric video, pick the frame where the hand contact changes, such as the moment of release.

Reach the Last Frame of Event and Click Set End Frame
6. Confirm the Event on the Timeline
After you click the button, the event appears on the timeline with its full duration. Check that the segment covers the whole action and nothing more.
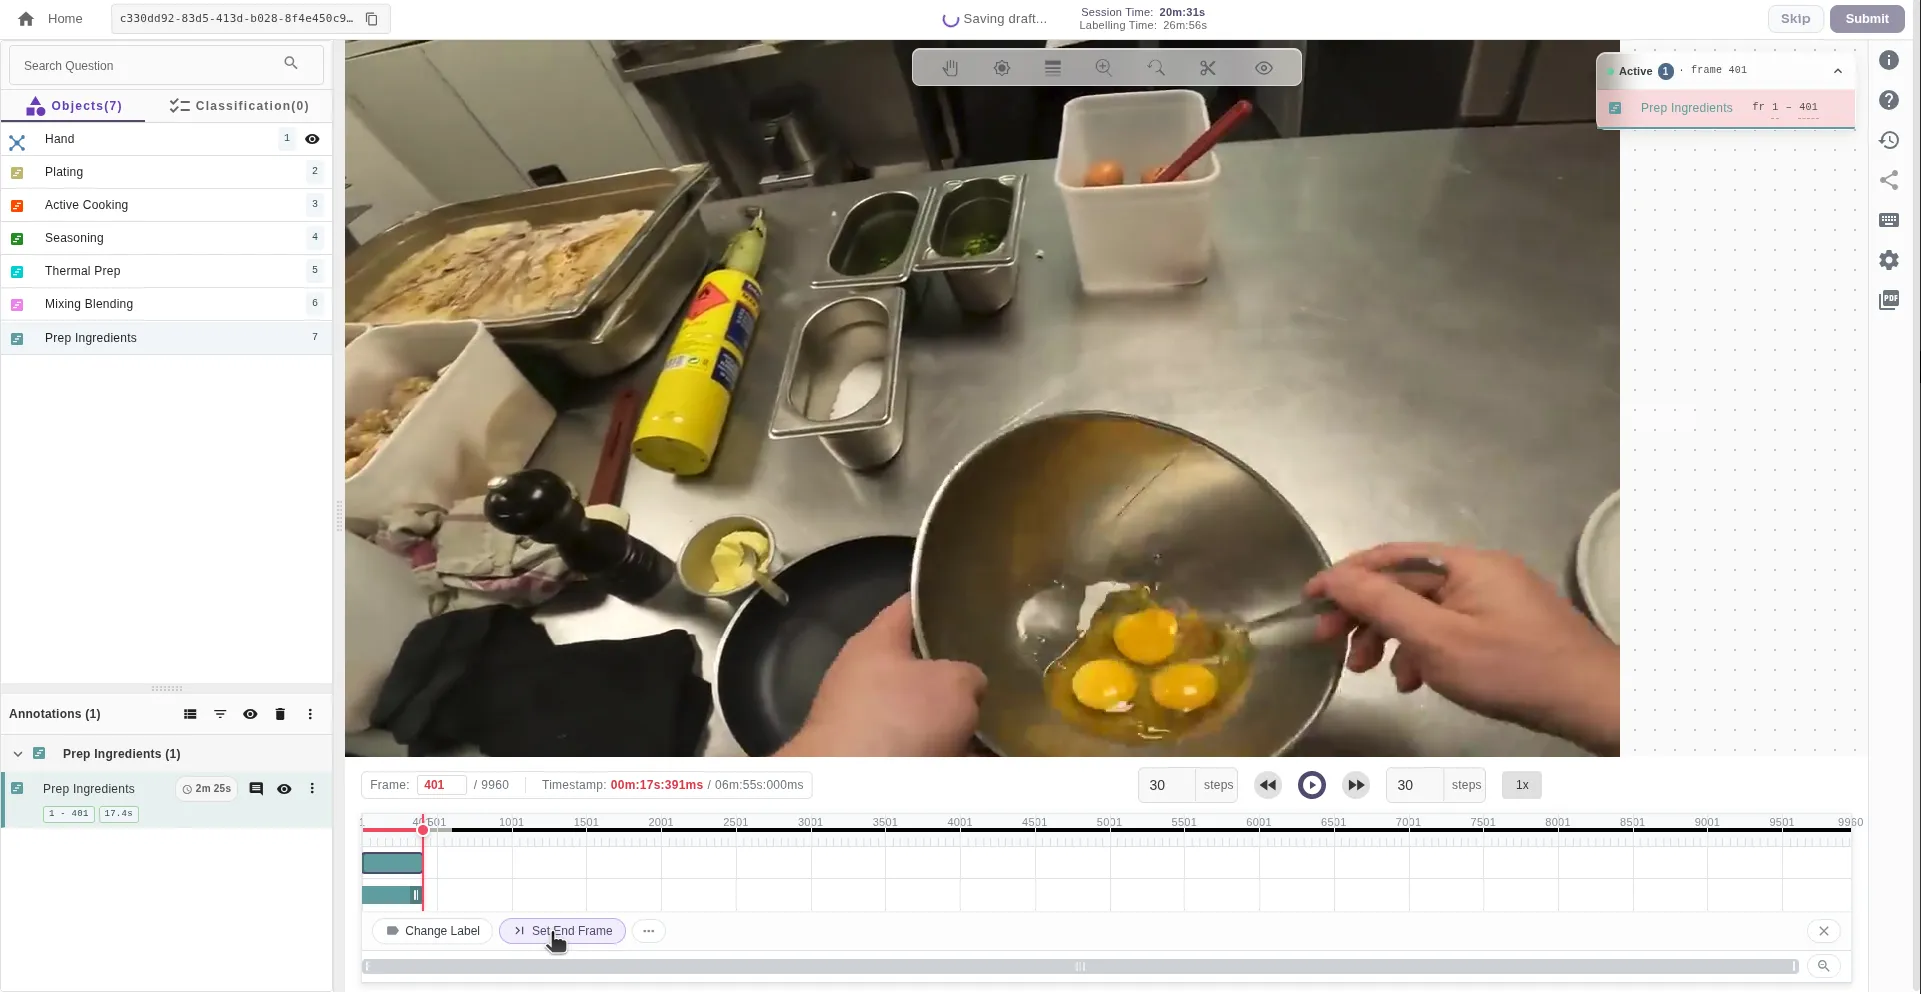
After Clicking the Button Event Will Set on Timeline
7. Repeat for All Events
Repeat the same process for every action in the video. A single manipulation clip often contains many short events placed back to back, so work through the timeline in order.
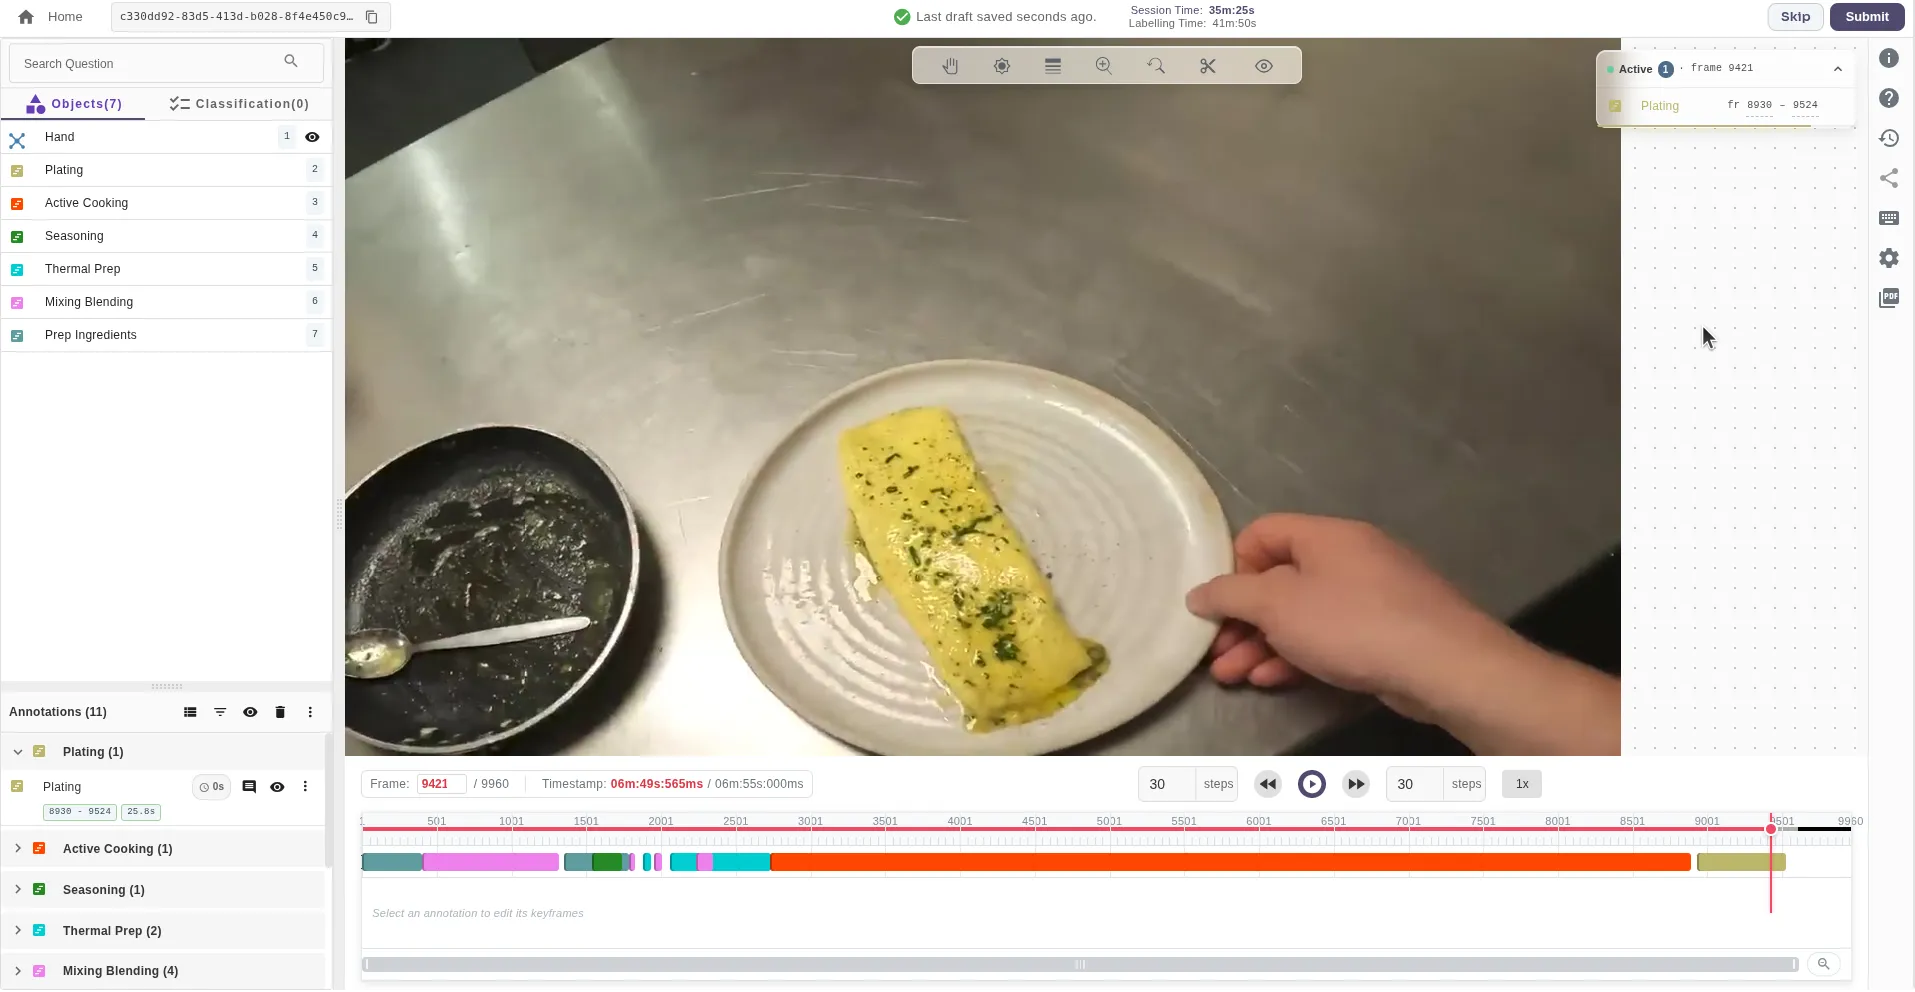
Repeat for All Events
8. Review the Tagged Events
Once tagging is complete, a reviewer checks the work in the Review tab. The review screen offers the same tools as the labeling page, so the reviewer can fix a boundary or label on the spot.
To leave feedback, click the comment icon next to an annotation, choose Mistake or Suggestion, and click Add Remark. Then make a decision with the buttons in the top-right corner. Accept marks the file as ready for export, while Reject sends it back for corrections.
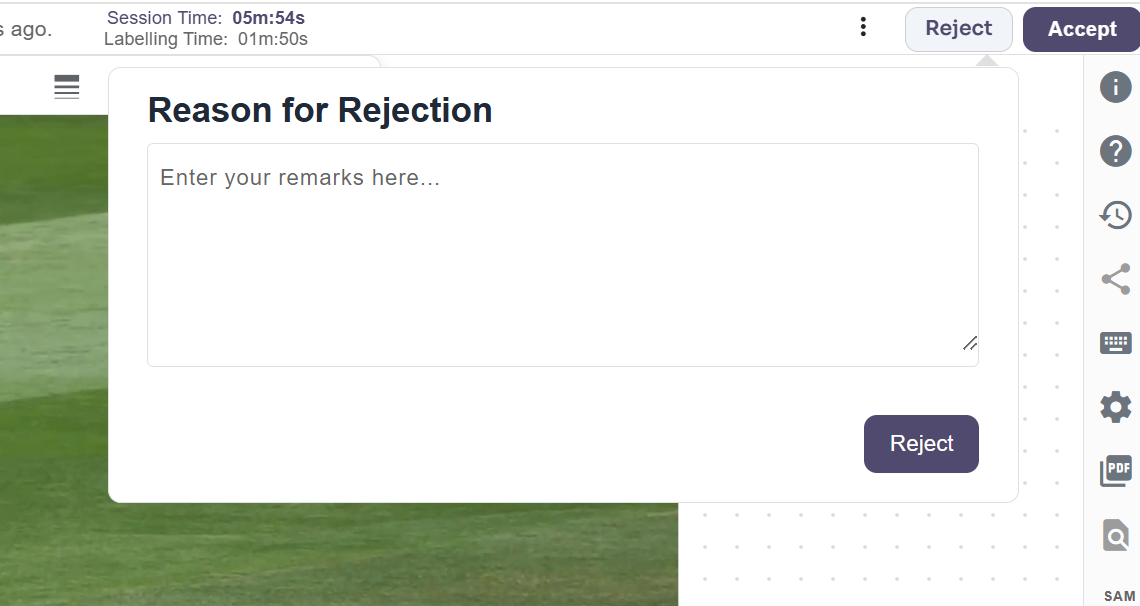
Review Actions
9. Export the Final Data
After review, select Export from the taskbar and click Create export. Set the File Status filter to Ready for Export, click Apply Filters, and choose All Files or only the files you need.
Next, click Export, enter an export name, pick a format such as JSON, and click Create. When processing finishes, click the three-dot icon next to the export and select Download. Your tagged events are now ready for model training.
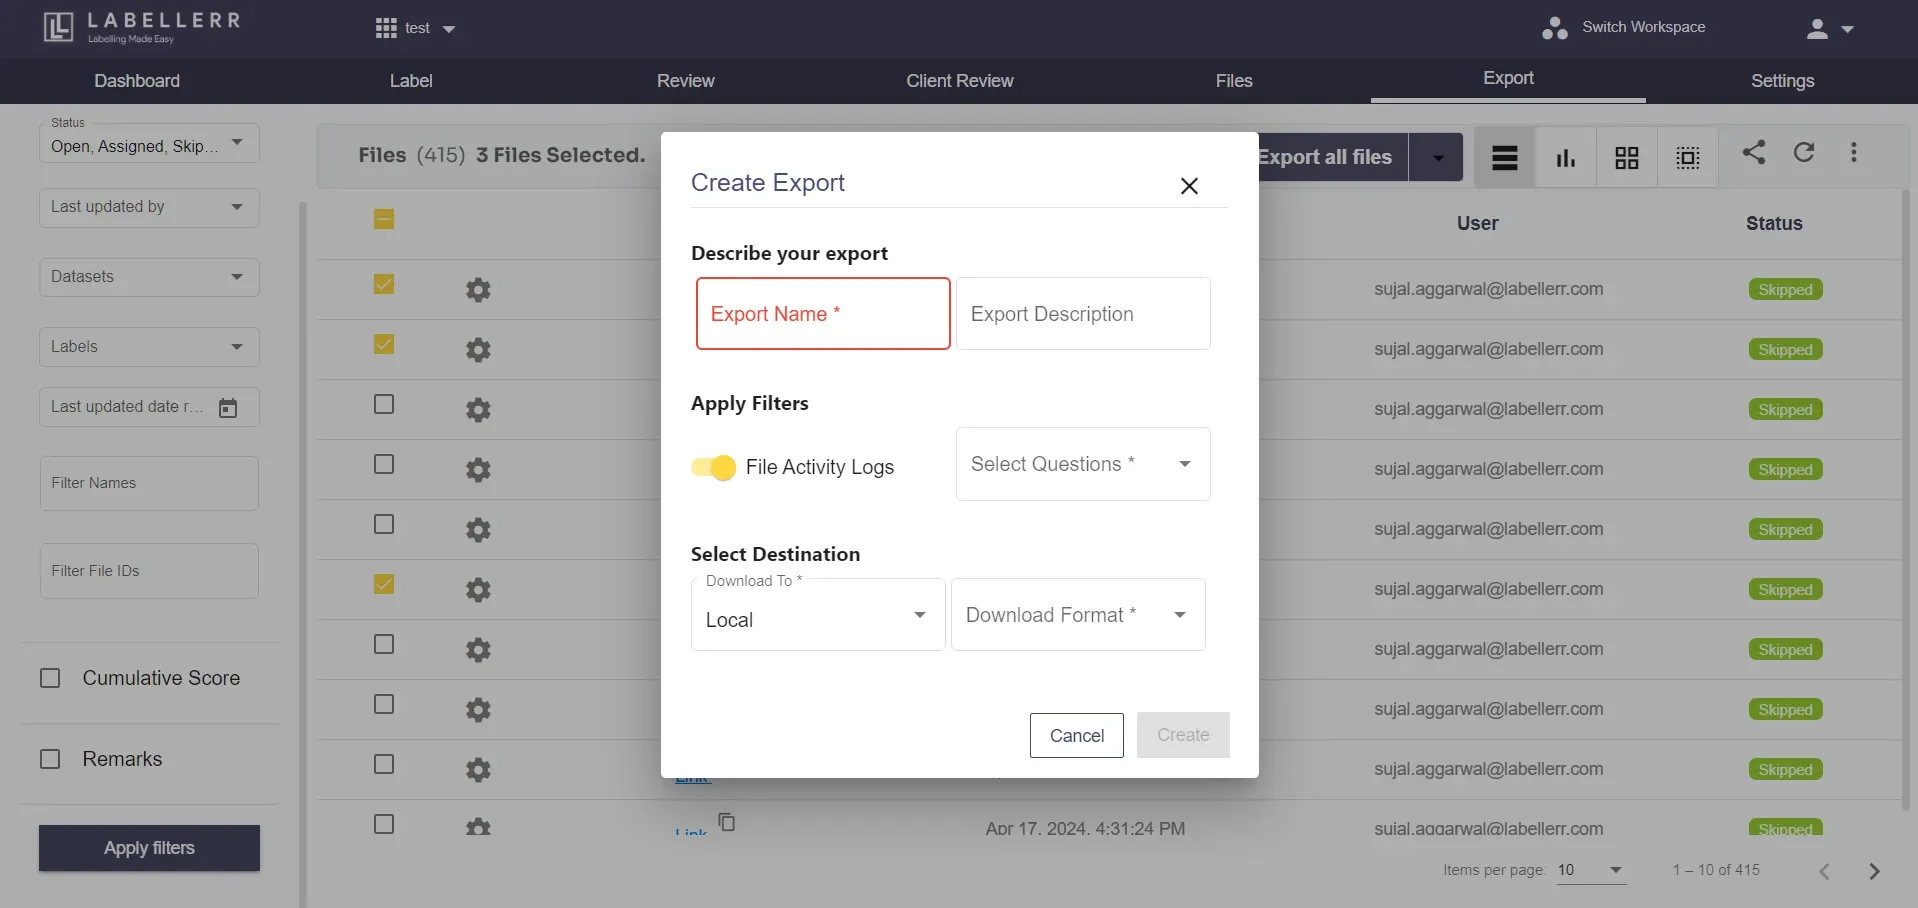
Export Details Popup
Add Attributes to Each Event
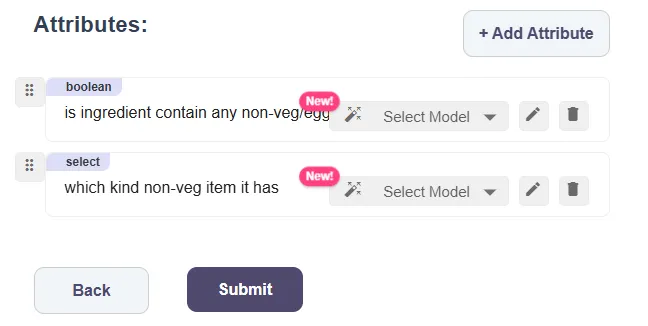
Labels alone rarely tell the full story, so Labellerr lets you attach attributes to each event class.
In the annotation settings, click Edit on the class and then click Add Attribute. Define fields that suit your project, such as hand used, object type or success status.
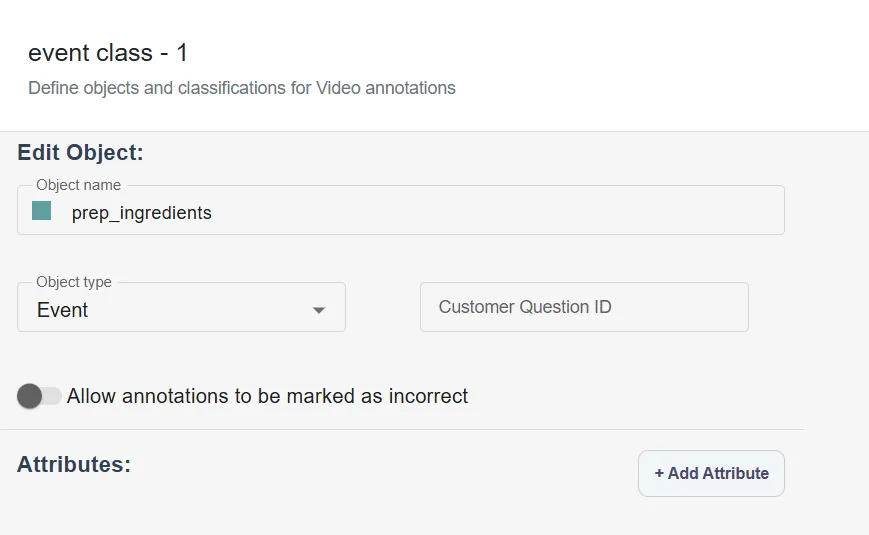
Enable Attributes in Annotation Settings
During annotation, the attribute box opens automatically when you select the event class. You can also press E to open it at any time.
Fill Attributes During Annotation
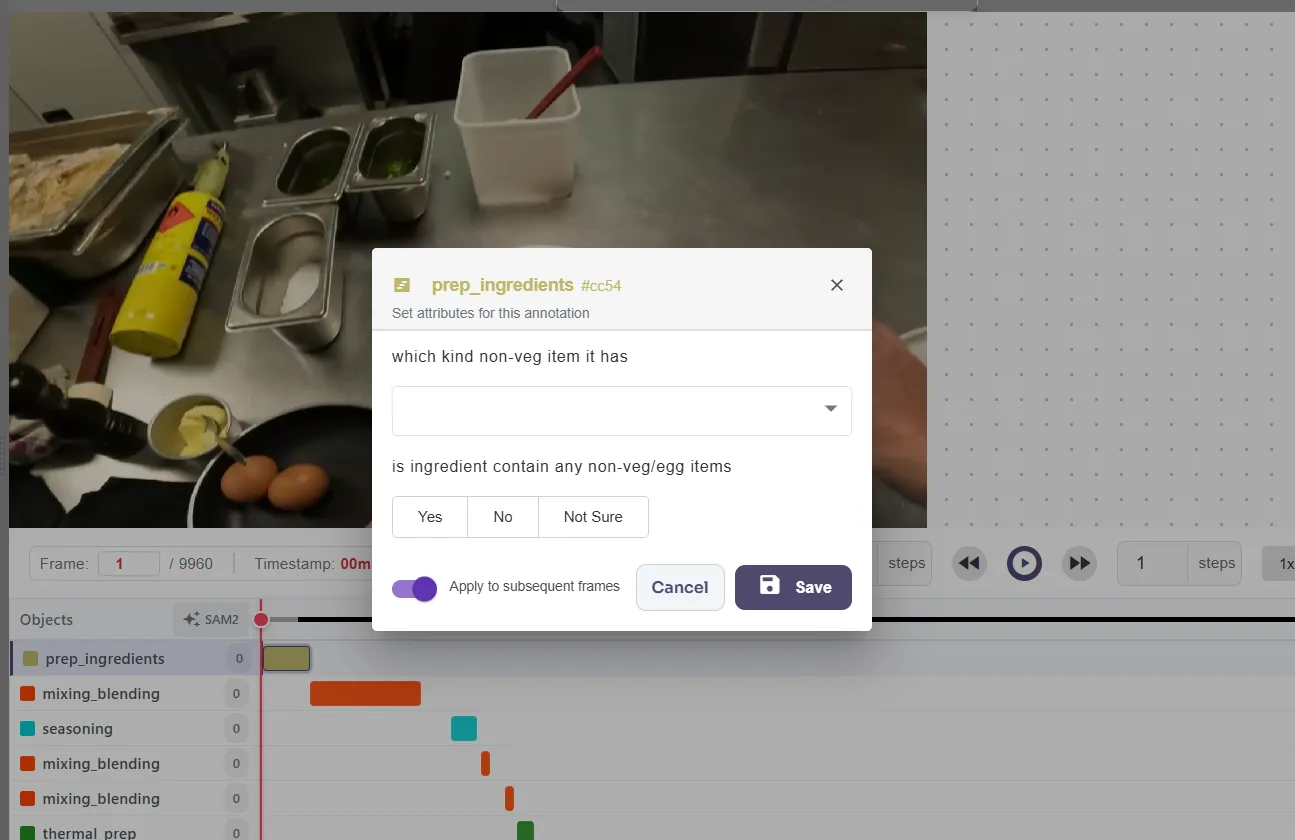
Event/Action Tagging with Attributes
Best Practices for Egocentric Event Tagging
Accurate tags depend on clear rules. These practices, drawn from robotics annotation guidelines and the Labellerr documentation, keep your labels consistent across annotators and videos.
- Tie boundaries to contact - Start and end each segment when hand and object contact changes, not when the hand merely moves closer.
- Use consistent names - Pick one verb and object format and keep it across the whole project.
- Check your sync - A 50 ms offset equals 1.5 frames at 30 Hz, enough to shift a boundary.
- Flag occlusion - Hands often hide objects in first-person video. Mark those frames instead of guessing.
- Calibrate first - Have annotators label 20 to 30 sample clips and compare results before full production begins.
- Review often - Regular checks catch drifting definitions before they spread through the dataset.
- Combine tools - Pair event tags with other Labellerr annotation tools for richer training data.
Conclusion
Egocentric video has become the fuel for robot learning, and data providers now collect it by the million hours. Yet footage only becomes training data once every action has a clear start, end and label.
Event tagging provides that structure. It breaks long tasks into manageable steps, grounds each step in language, and records the details that models need to learn real manipulation skills.
With Labellerr, the workflow stays simple: create a project, define your event classes, mark each action on the timeline, and enrich it with attributes. Start with one short task video, refine your label rules, and then scale to the full dataset.
The robots of tomorrow will learn from the tags you create today, so make every boundary count.
Ready to streamline your robotic training data pipeline?
Discover how Labellerr transforms raw egocentric footage into production-ready datasets, or explore our specialized Labellerr Robotics Data solutions to scale your vision-language-action models today.
FAQs
What is event tagging in egocentric video?
Event tagging is the process of marking specific start and end time boundaries on a first-person video timeline to isolate particular actions, such as "grasp cup" or "pour water," converting raw footage into structured training data for robotics.
Why is event tagging critical for robotics training?
Robots cannot learn manipulation tasks from massive, unstructured video files alone. Timed action tags break long tasks down into learnable steps, provide essential language grounding for Vision-Language-Action (VLA) models, and record failure states.
How do I handle occlusions when tagging first-person video?
In egocentric (first-person) footage, hands frequently obstruct objects. Best practices dictate marking those occluded frames rather than guessing or interpolating action boundaries incorrectly.
Sources:

Simplify Your Data Annotation Workflow With Proven Strategies