

Executing NER Project On Labellerr Integration With AWS Sagemaker

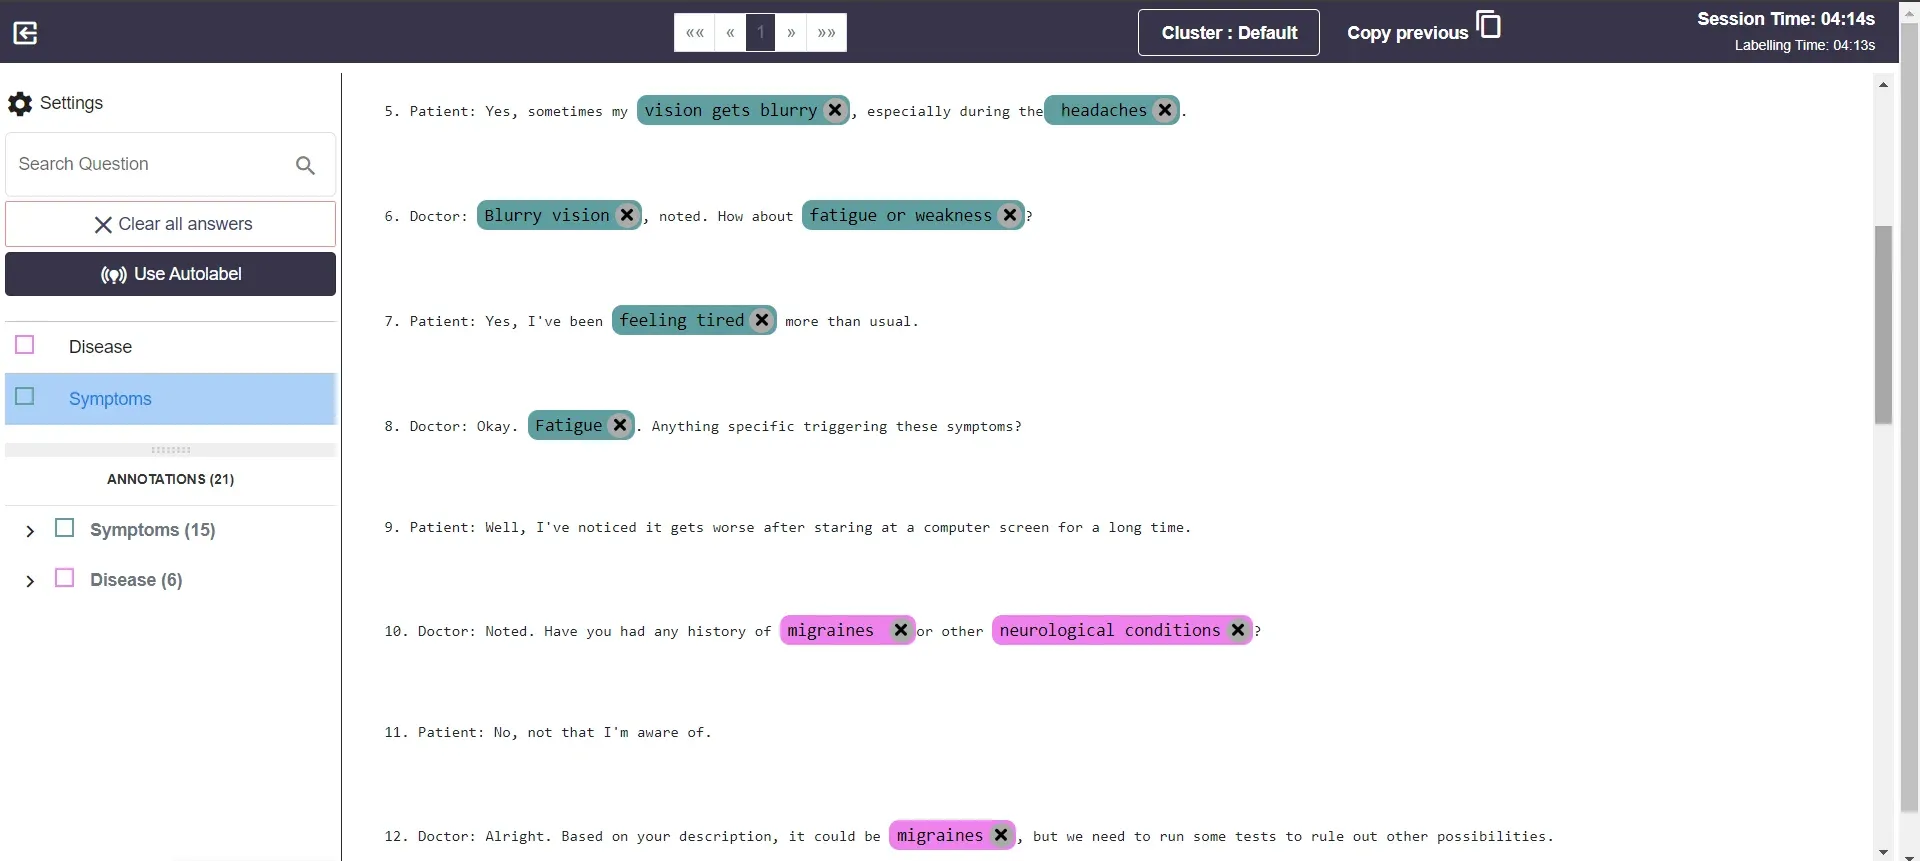
Table of Contents
Introduction
Natural Language Processing (NLP) has become an integral part of many applications, from chat bots to sentiment analysis. In this hands-on guide, we'll walk through the entire process of Name Entity Recognition (NER) annotation, a very common use case to develop NLP based AI model.
We'll start from raw text document data collection to labeling using Labellerr and then exporting the labeled data to Amazon S3 for training in Amazon SageMaker.
Starting a machine learning and natural language processing (NLP) journey can be challenging, particularly when navigating the complexities of data annotation.
We'll demystify the process in this extensive guide and introduce you to the user-friendly Labellerr annotation tool for data annotation. Not only that, but we'll also expertly walk you through the next steps of using AWS SageMaker for productive and successful model training.
This guide is designed to make the process of annotation and training easy to understand, regardless of your level of experience. Imagine a world where using AWS SageMaker to train models is simple and annotation of text, data, and images becomes easy.
Come along as we explore the possibilities of Labellerr for annotation tasks and work our way through AWS SageMaker training, making sure that each step is understandable, doable, and accessible. Let's get started and turn your dreams of NLP and machine learning into reality.
What is data annotation?
The practice of labeling individual training data elements—whether they be text, images, audio, or video—to assist machines in determining what exactly is present and what is significant is known as data annotation. After annotation, this data is utilized to train the model. Annotated datasets become ground truth datasets, and data annotation contributes to the broader quality control process of data collecting.
Disadvantages of AWS ground truth
However, for large datasets, Amazon AWS does not provide support for collaboration and better annotation tools. As a result, many individuals opt to outsource a labeling platform that offers automated labeling, faster manual labeling, and collaborative annotation.
This enables the division of labeling tasks among multiple individuals, significantly accelerating the labeling process—nearly 90 times faster than the traditional approach.
Labellerr Helps Getting Large Volume Labels
This tool addresses all the disadvantages mentioned above in Ground Truth, significantly accelerating the annotation process for all images.
Additionally, after annotating all the images, it can export them to your desired cloud service, whether it's AWS, Azure, or Google Cloud. Now that you have all the annotated images, and you want to write code for model training, let's follow the steps below to start training your model.
Model Building
Step 1: Raw Text Document Data Collection
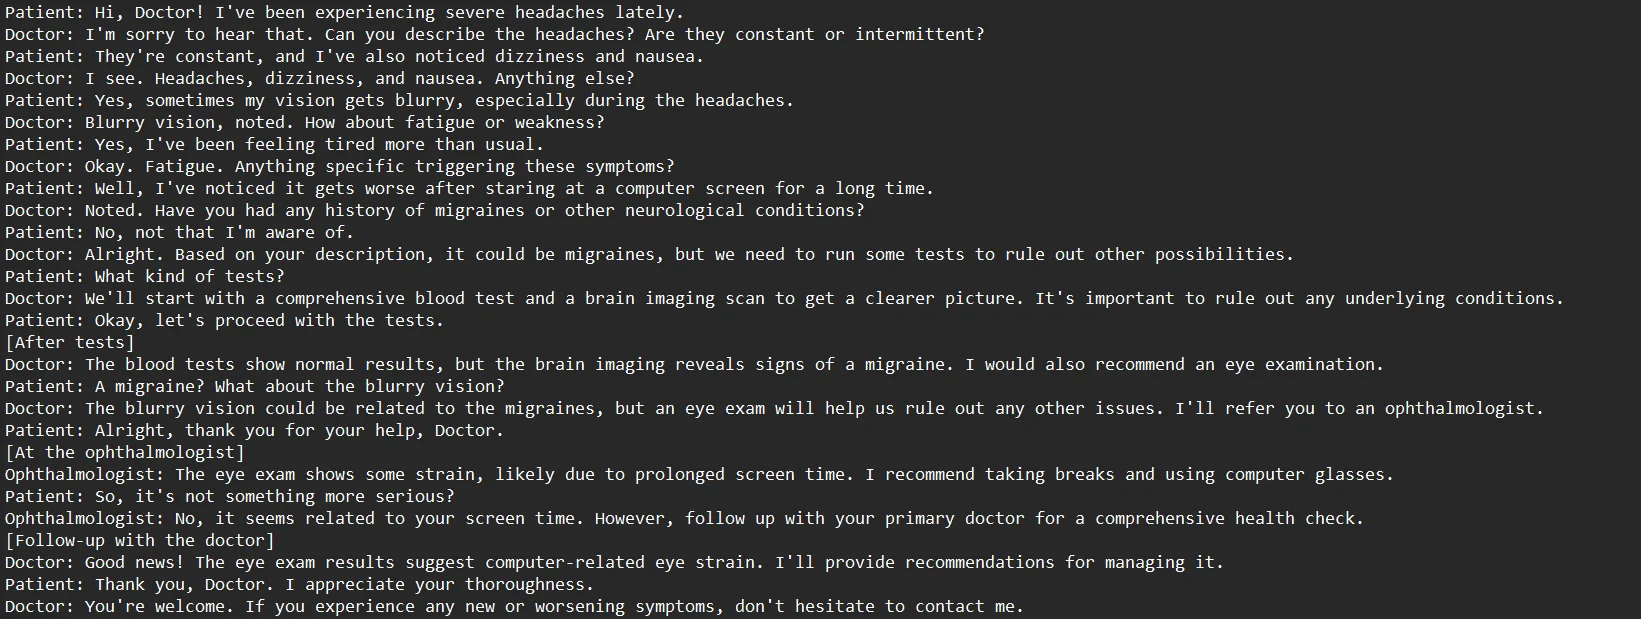
Your NLP project has to start with a representative and diversified dataset. The language and context your NLP model will come across in real-world situations should ideally be reflected in this dataset. Gather unformatted text documents from a range of online resources, including books, articles, forums, and social media. Make sure there is a healthy balance between favorable and unfavorable opinions, or whatever target categories you are interested in.
Step 2: Data Preprocessing
Before labeling your data, perform necessary preprocessing tasks such as cleaning the text, removing irrelevant information, and handling any noise. This step ensures that the labeled data accurately represents the language patterns you want your NLP model to learn.
Step 3: Labeling with Labellerr
Labellerr is a powerful tool for annotating and labeling data, making it an excellent choice for preparing your NLP dataset. Upload your data to Labellerr and define the labels or categories you want to assign. Engage with the labeling process, ensuring consistency and quality in your annotations. This step is crucial for training a robust and accurate NLP model.
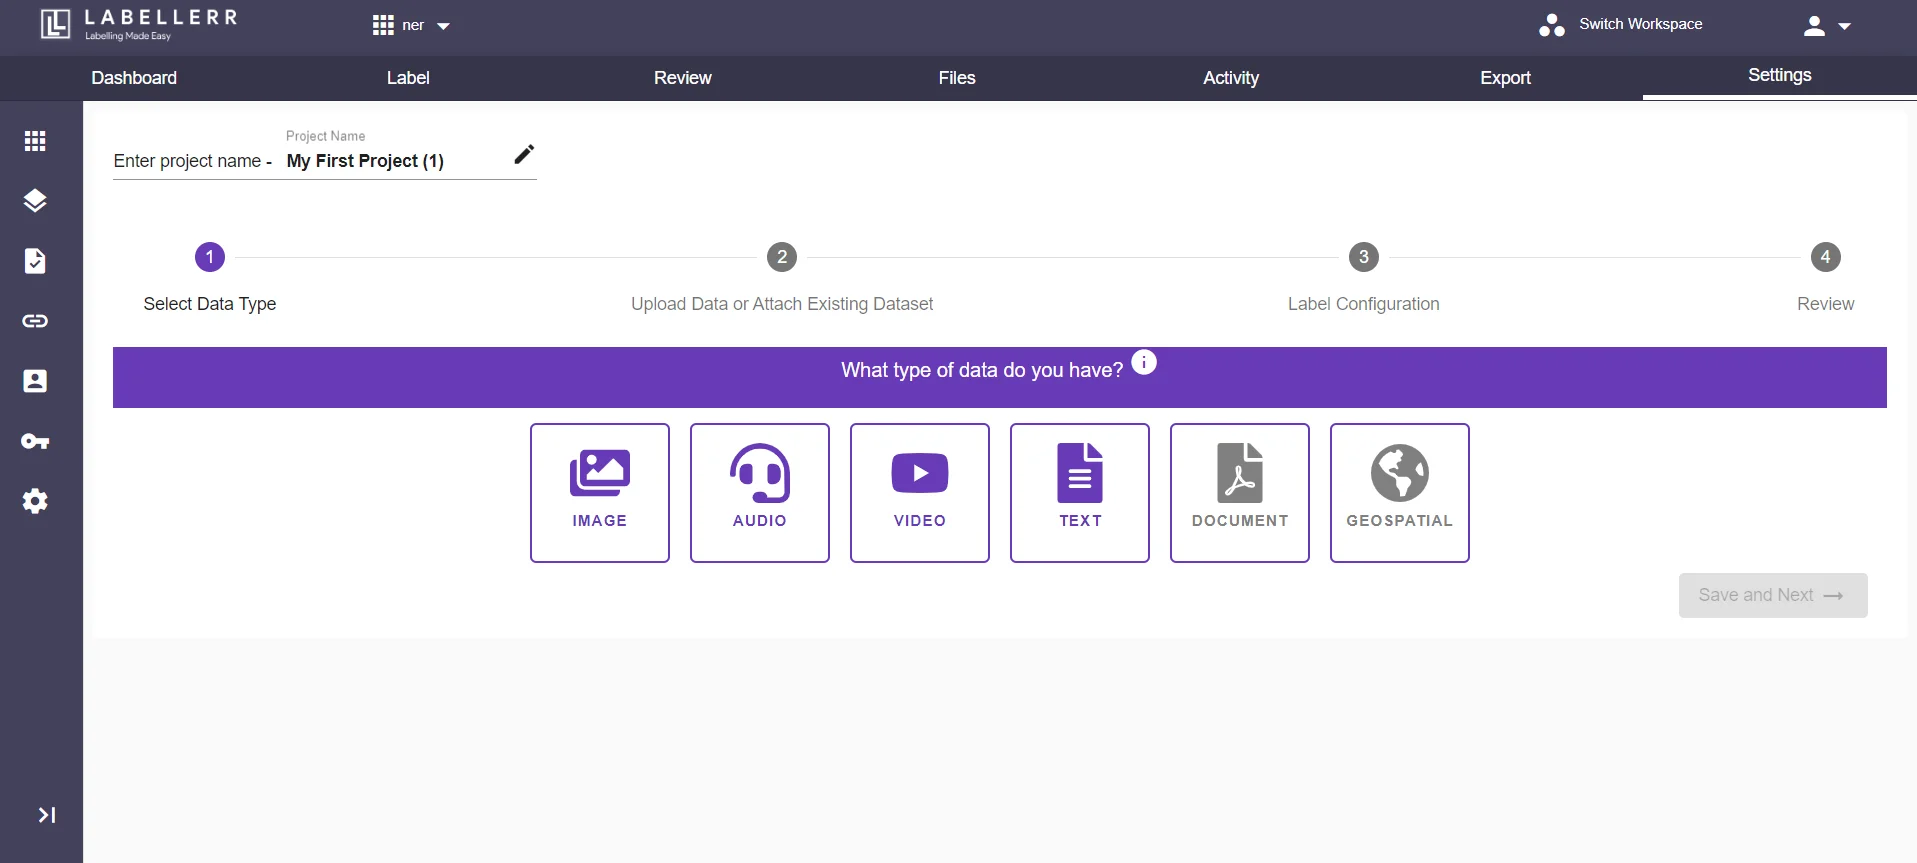
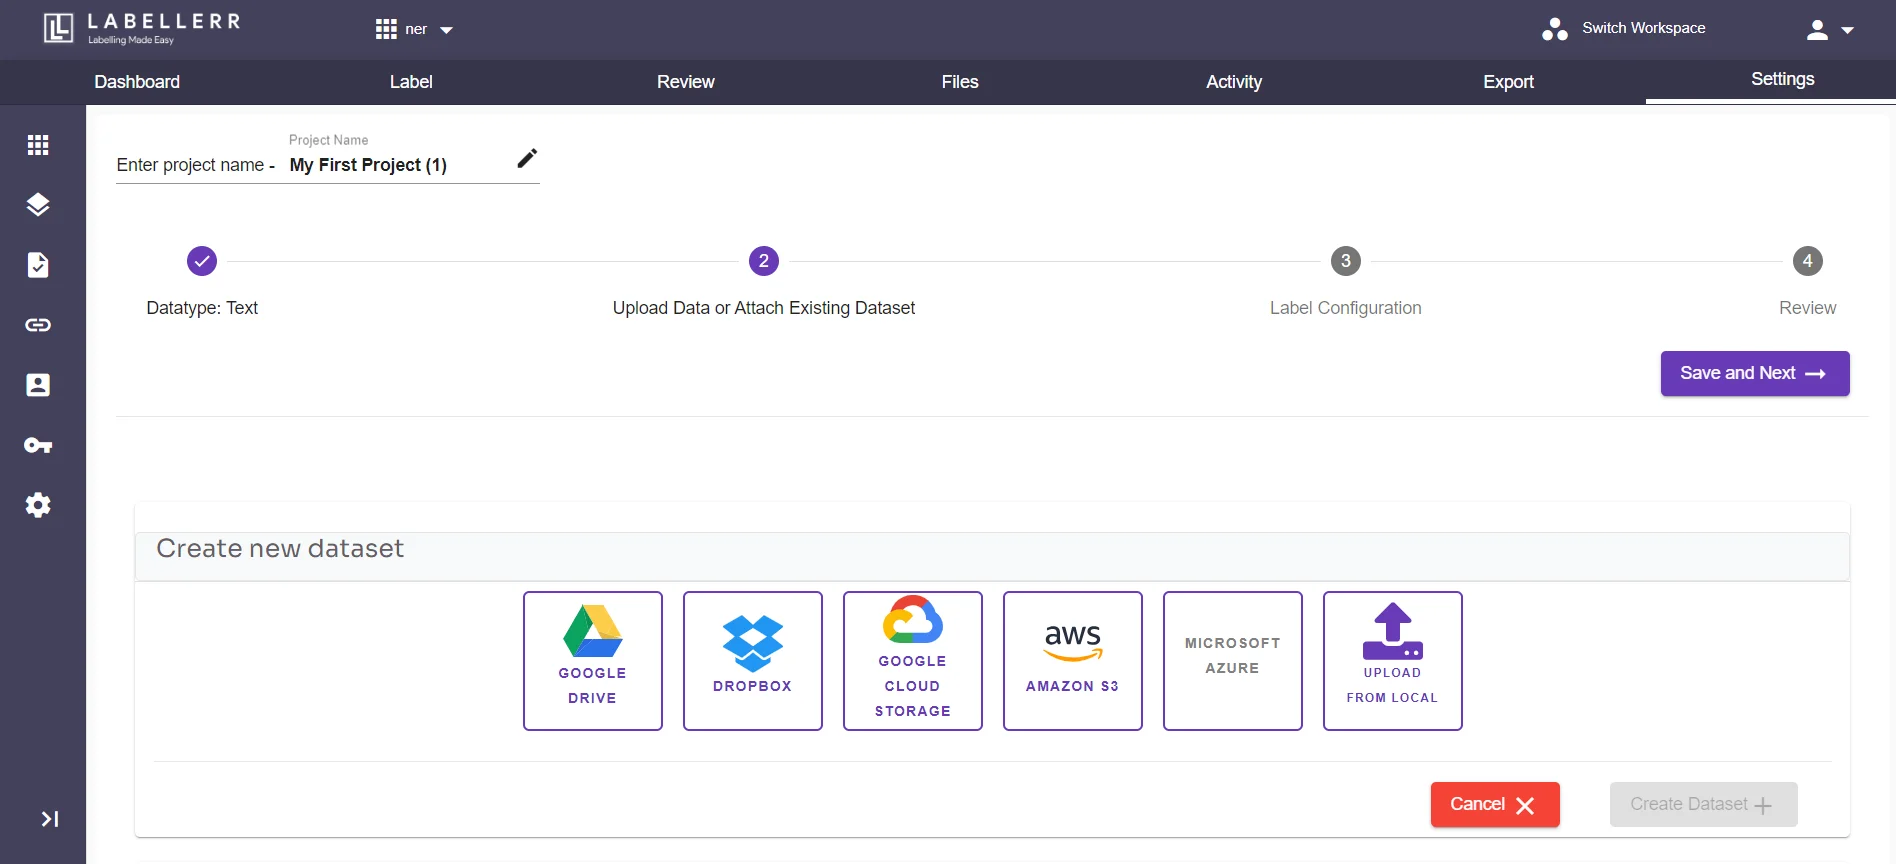
3.1 Create your project, then select the datatype and upload the data using any available option or choose the existing dataset.
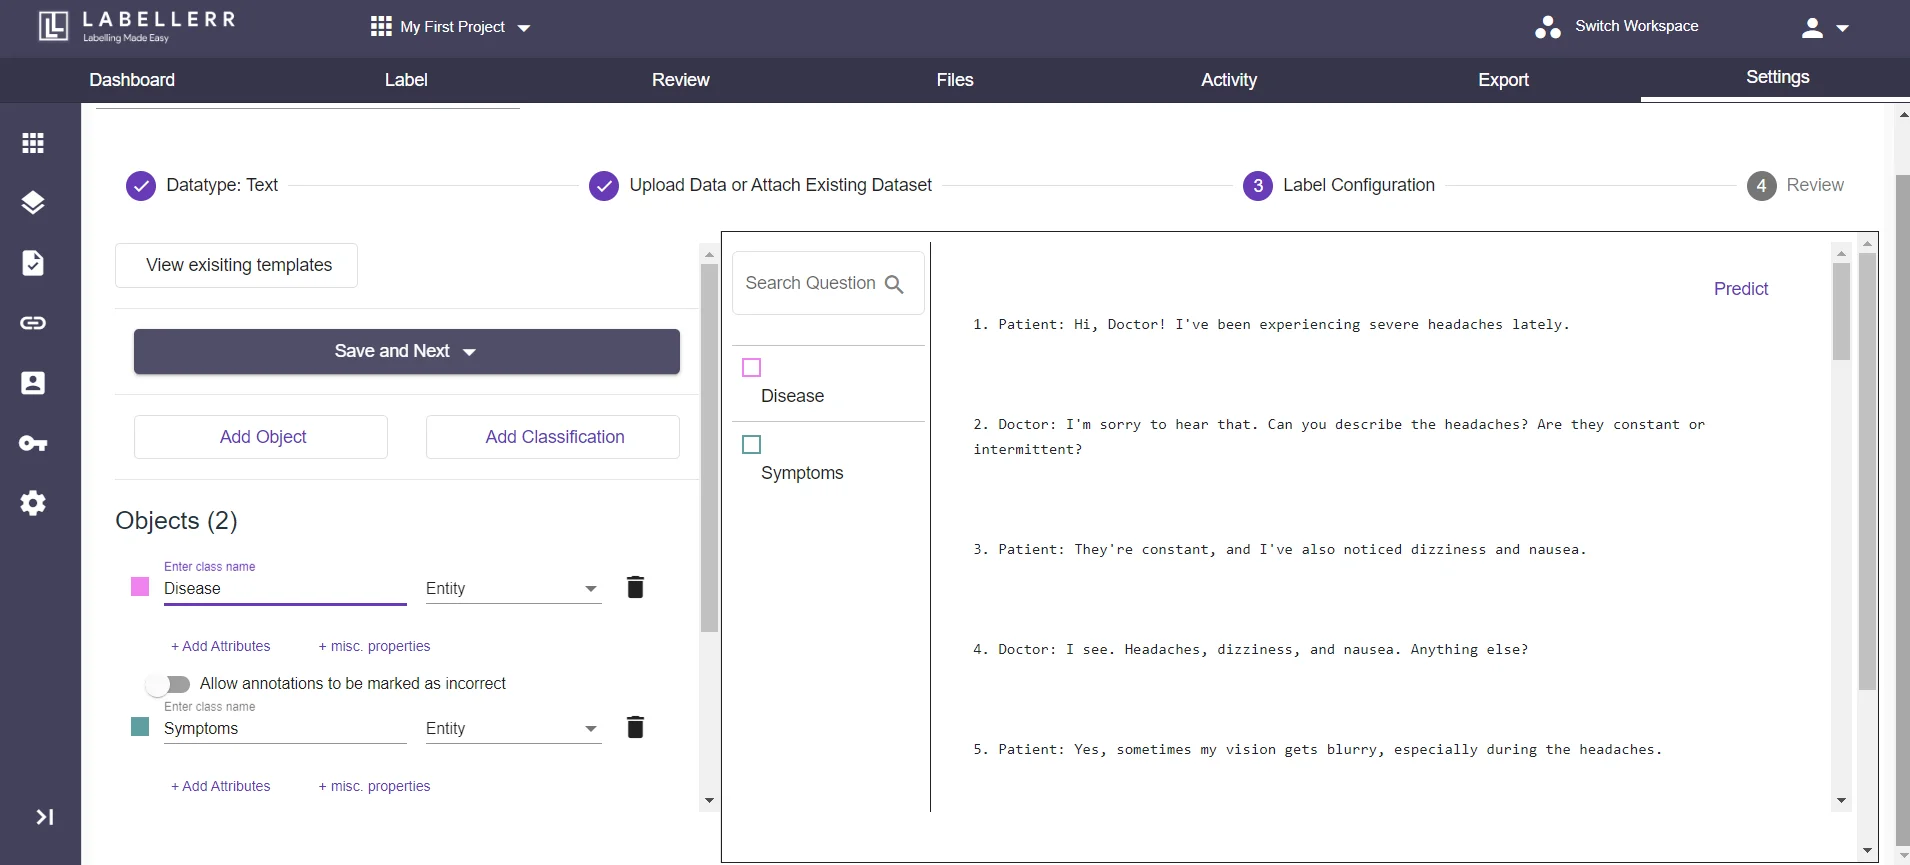
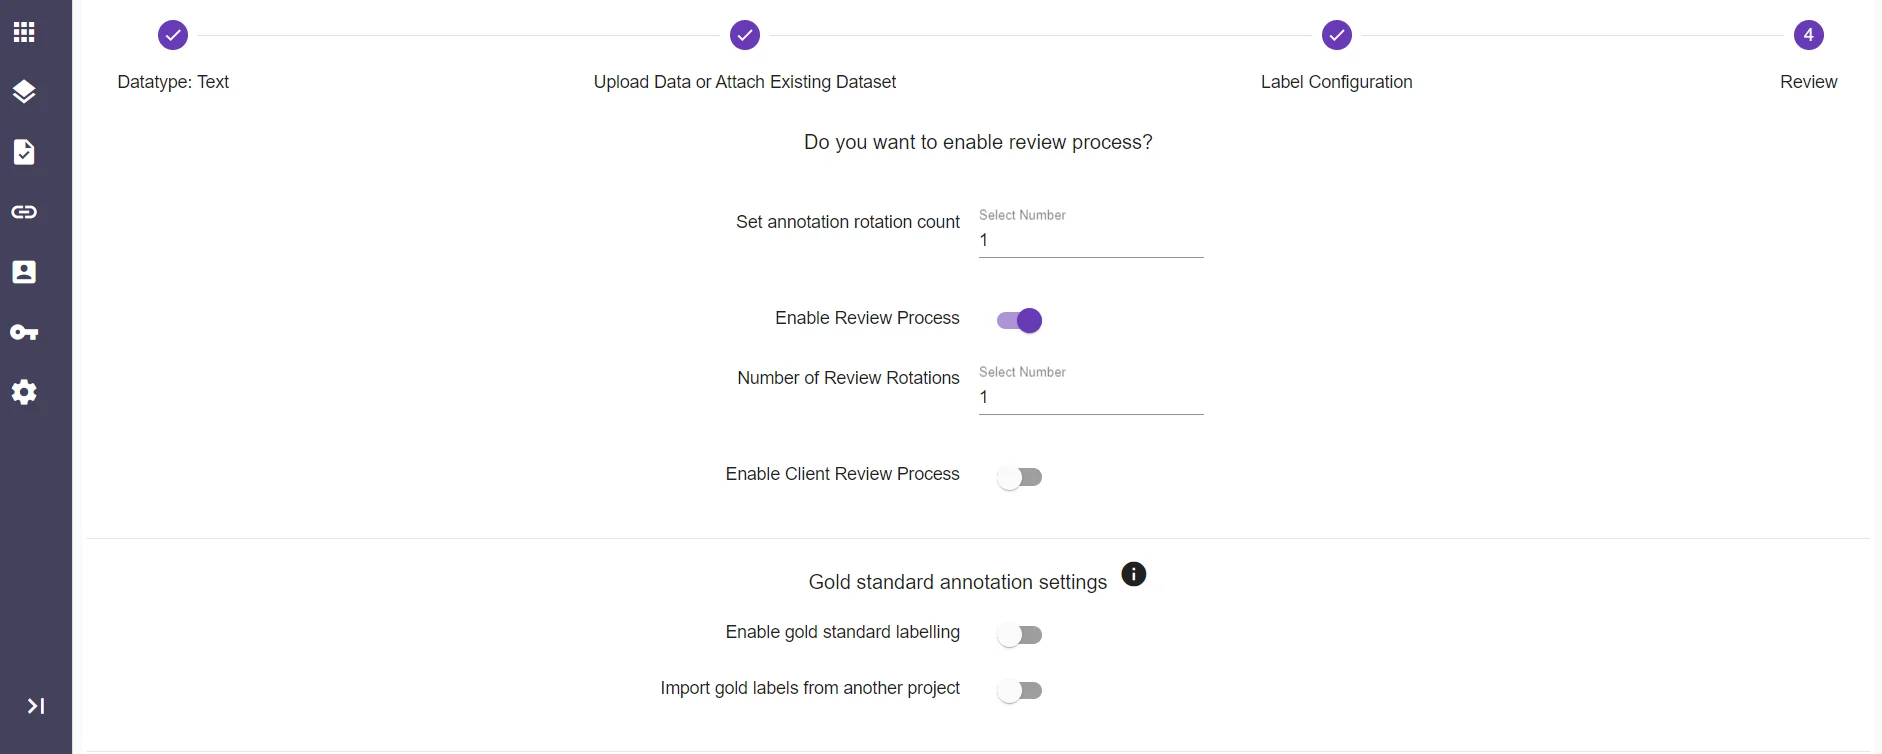
3.2 Configure the labels, add the objects, give them properties, and add classification, and enable review process.
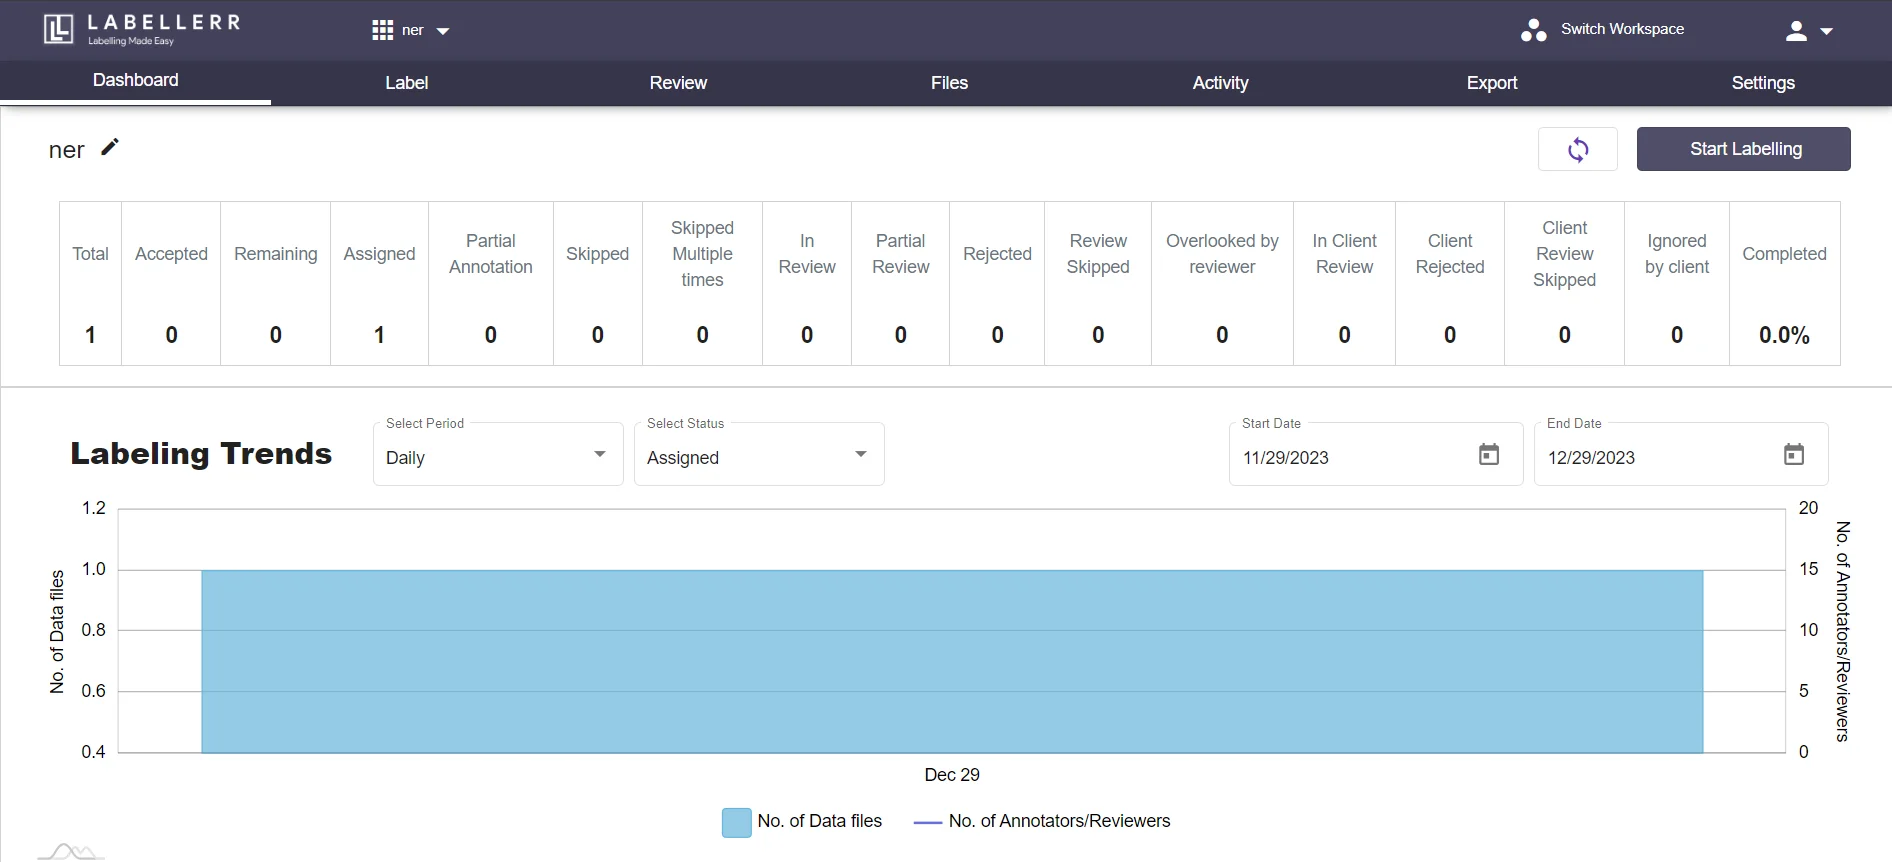
3.3 Led to a dashboard with several options, including Label, Review, Files, Activity, Export, Settings.From here you can Start Labeling by clicking on the button giving on the corner under settings
3.4 Here, you can begin labelling by yourself using the objects we have added initially or by using Labellerr's autolabel feature, which further streamlines our work. Then submit the label data and there will be no data will be left for label.

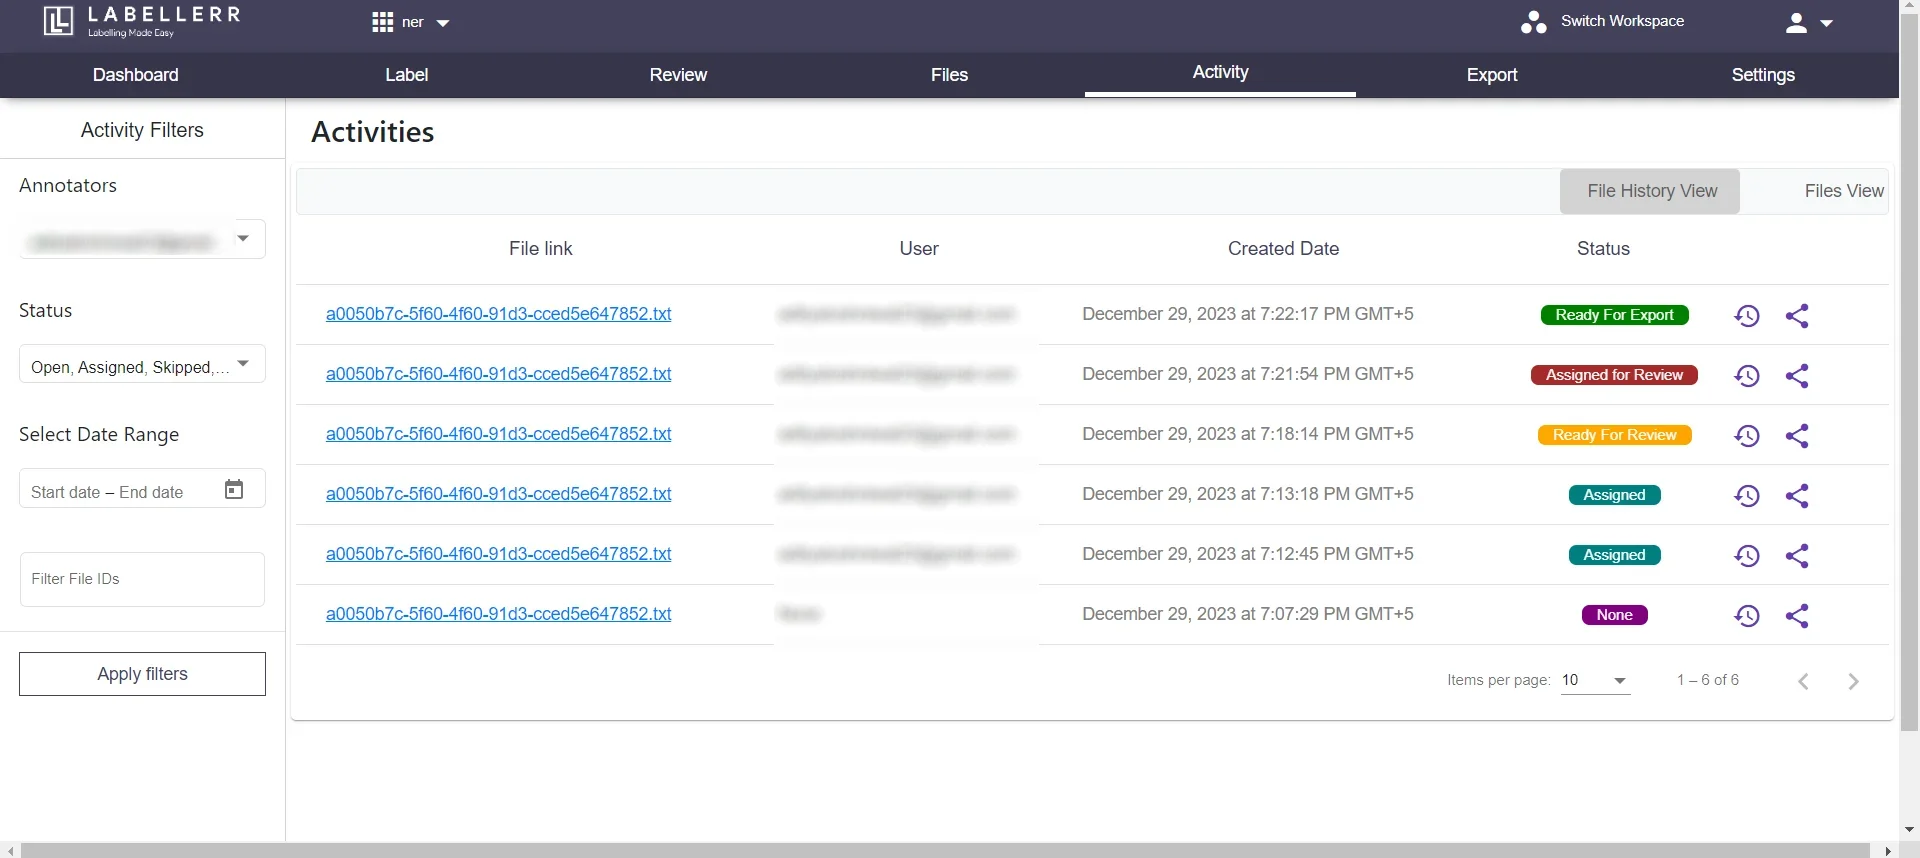
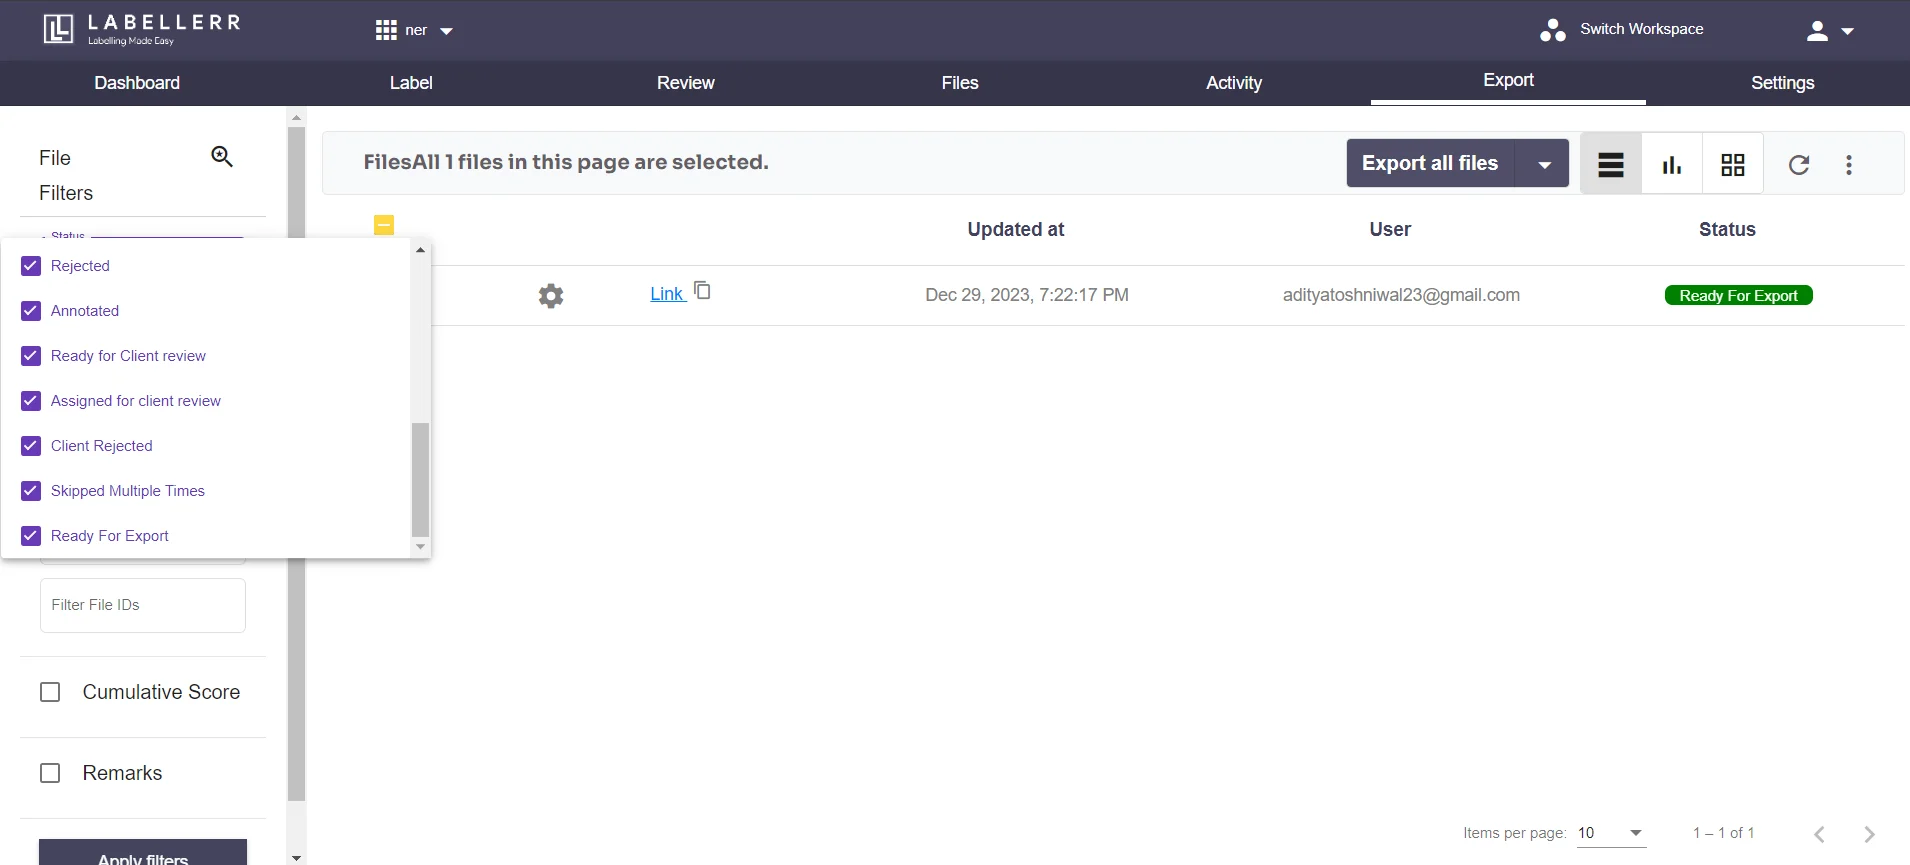
3.5 In the activity section, you can examine all of your flies and activities along with whether your file is assigned, ready for review, assigned for review, or ready for export.In export section you can can see all the ready to export.
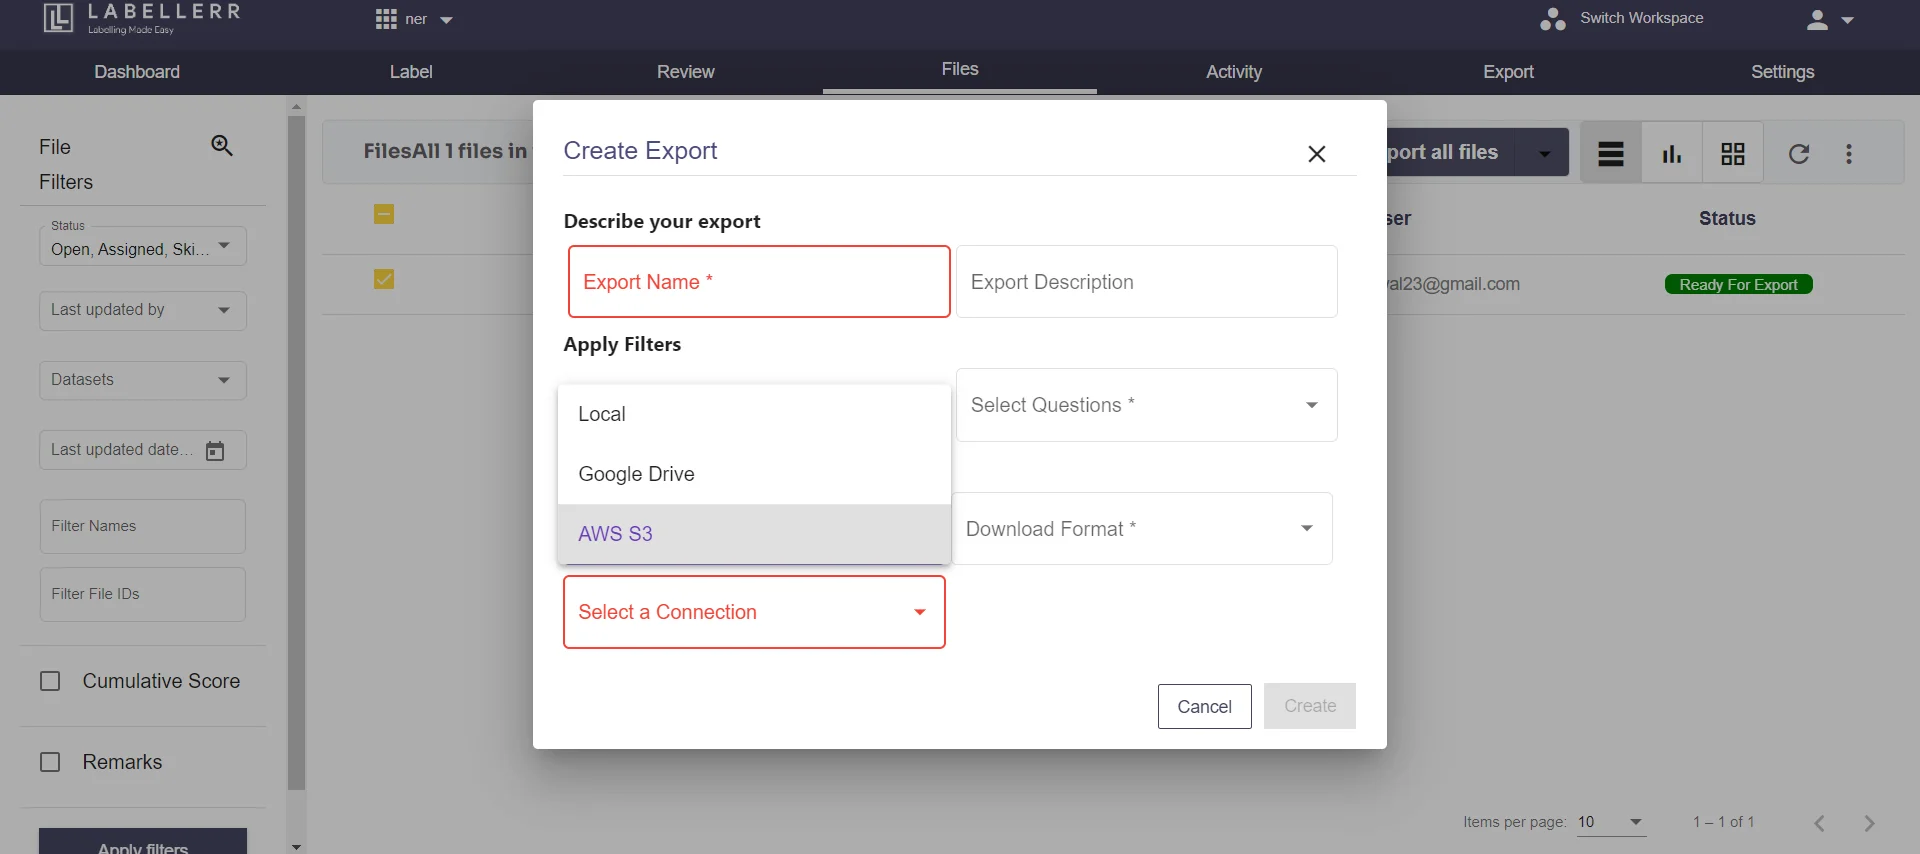
3.6 You may now create an export under the files area by entering the Export Name, Export Description, download format, and download options for local, Google Drive, and Amazon S3. Can establish a link if necessary.
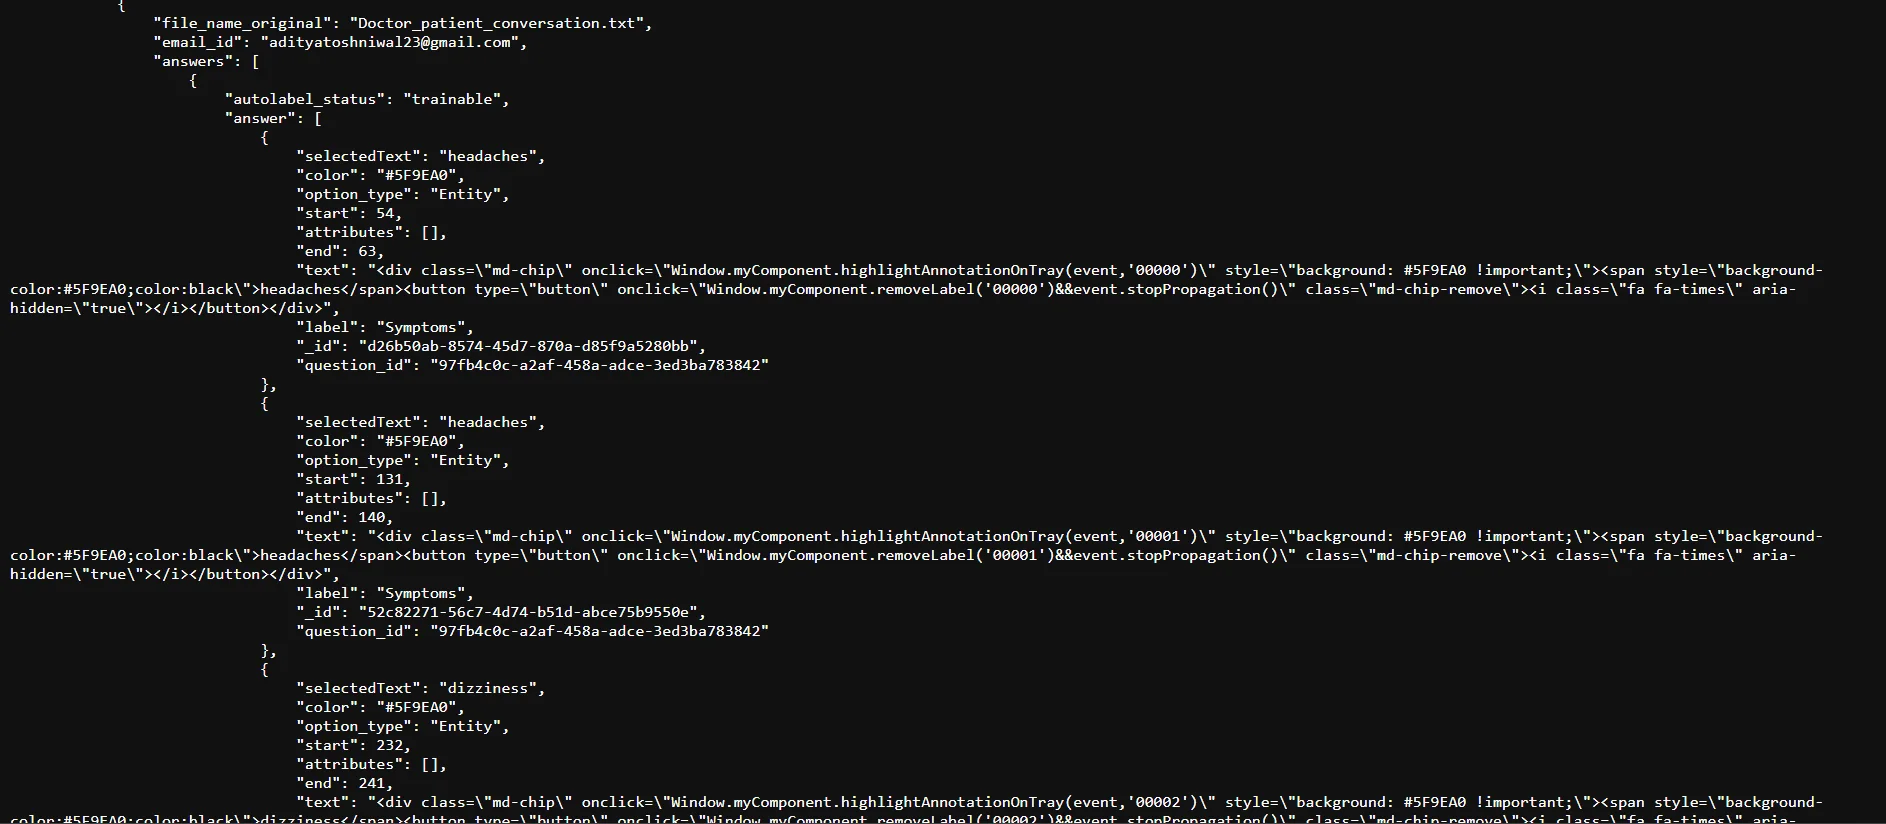
3.7 Here a snapshot of exported file in JSON format.
After annotating all the data, it can export them to your desired cloud service, whether it's AWS, Azure, or Google Cloud
Step 4: Export Labeled Data to Amazon S3
Once you've completed the labeling process in Labellerr, export the labeled data in a format compatible with Amazon SageMaker. Common formats include CSV or JSON. Next, upload the exported dataset to an Amazon S3 bucket. S3 provides scalable, secure, and durable storage for your datasets, making it an ideal choice for preparing your data for machine learning tasks.
Step 5: Set Up Amazon SageMaker
Navigate to the Amazon SageMaker console and set up a new training job. Specify the algorithm and hyperparameters suitable for your NLP task. SageMaker provides a range of built-in algorithms and supports custom algorithms, giving you flexibility in model selection.
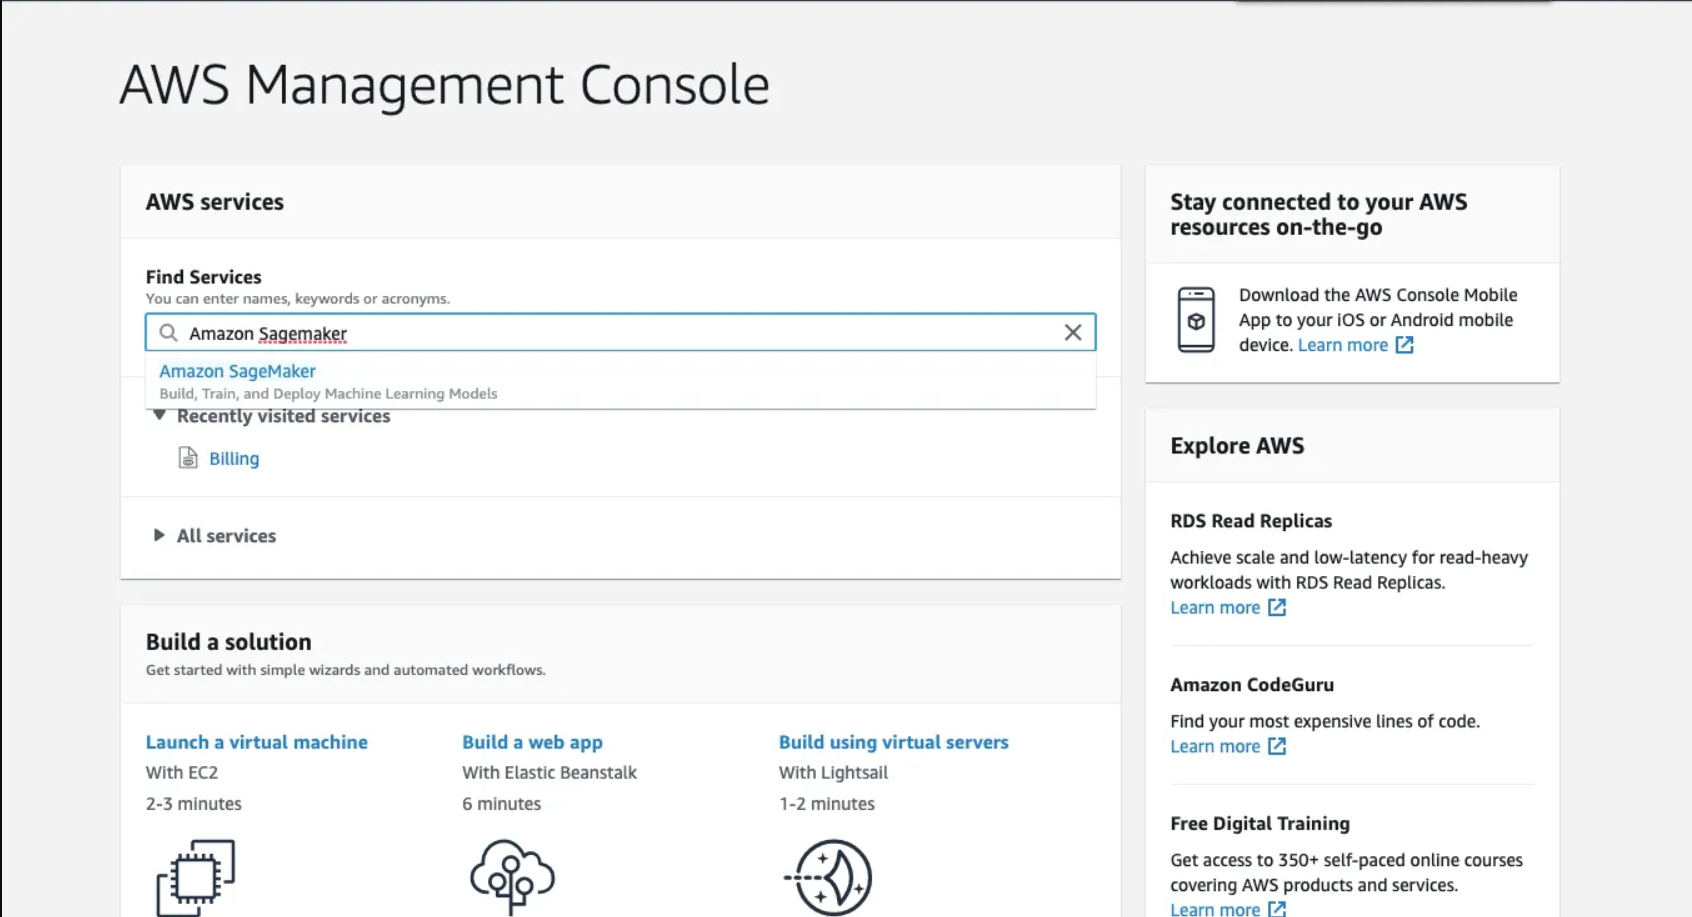
5.1 Go to AWS, management console
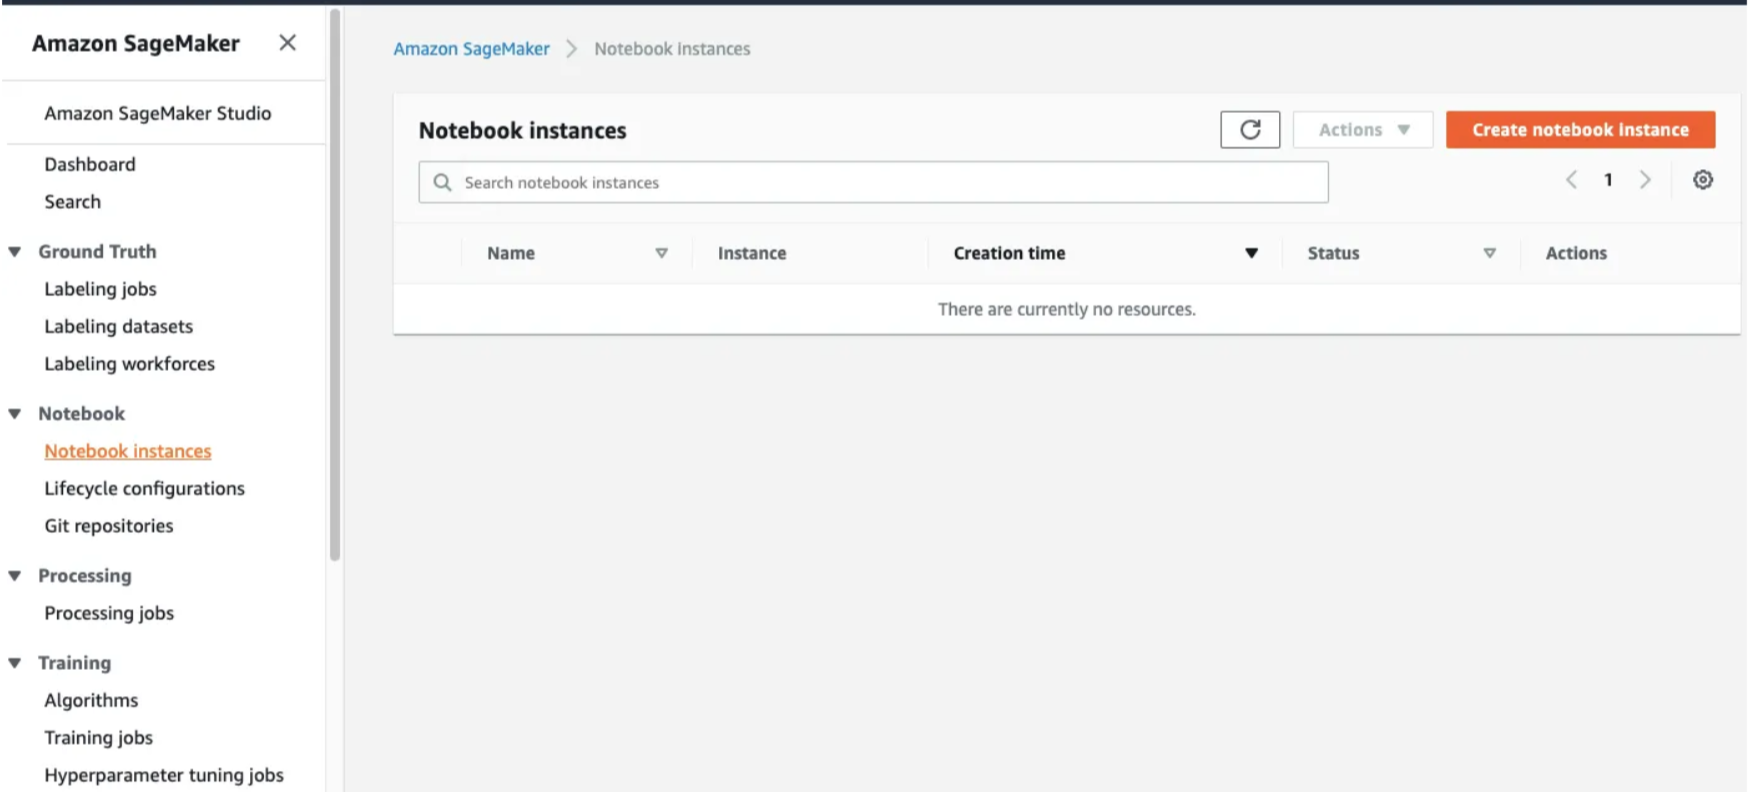
5.2 Open the Notebook Instances and click on Create Notebook Instance.
- During the setup, you'll encounter prompts for Notebook Instance Settings. Provide it with a descriptive name and opt for the
ml.t2.mediuminstance type. This represents the basic tier and is suitable for our current needs. As we delve into more advanced models, we can consider higher-tier instances. Cost considerations need not be a concern, as AWS operates on a pay-per-use pricing model, ensuring you only pay for the resources you consume.
Other services can be left to their default settings. If you wish to explore them further, you can always refer to the documentation for more detailed information. documentation
5.3 Create an IAM role

5.4: Confirmation screen
After this, you will receive a message saying
success! you created an IAM role.
After some time after loading, we can see the console says the notebook instance is in "Inservice"

Step 5: Create a new file and select.ipynb file from the drop-down menu
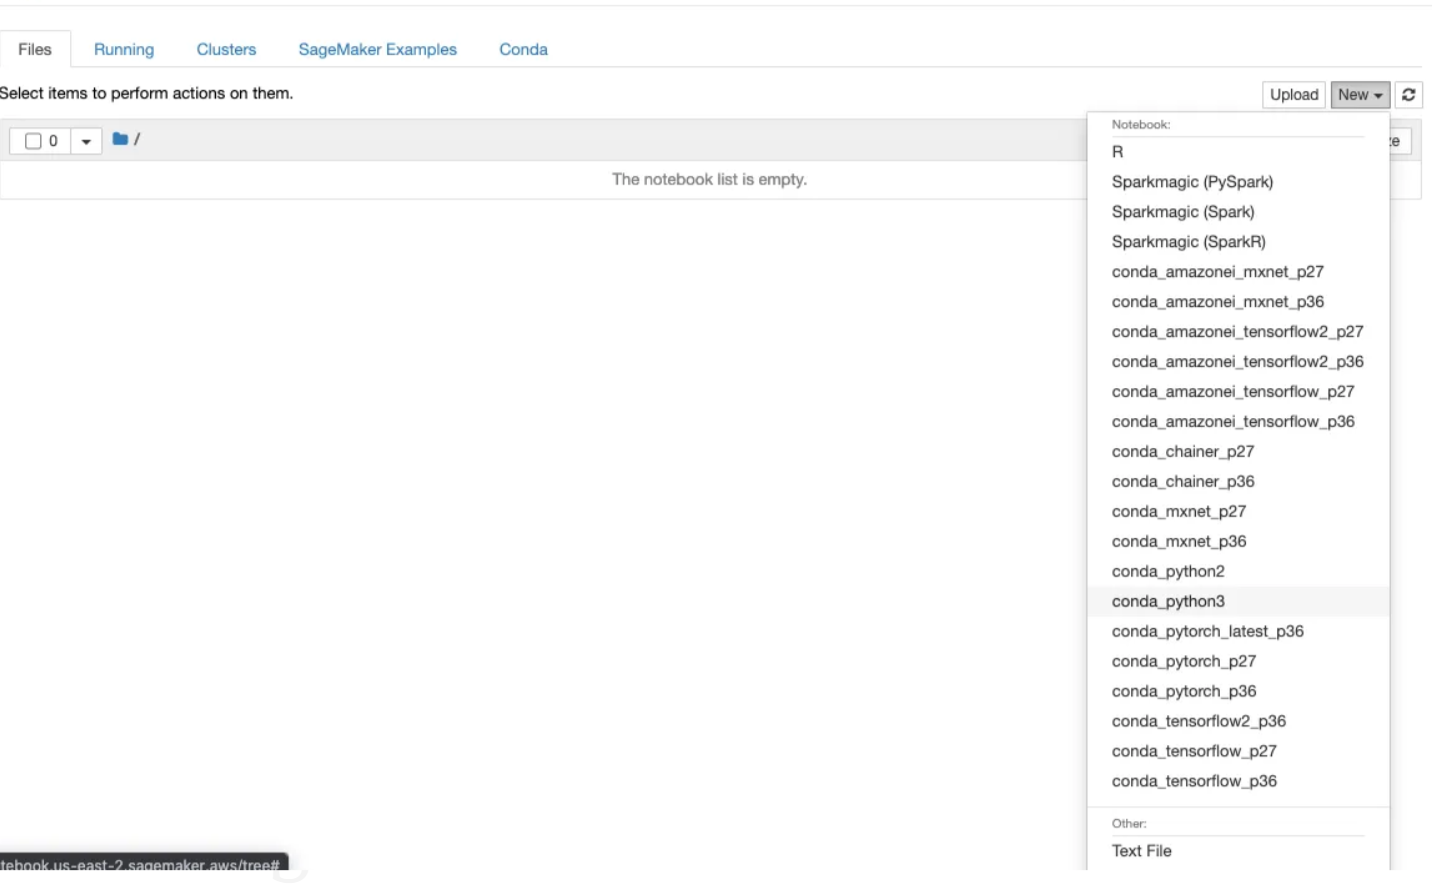
Now that our environment setup is complete.
Step 6: Train Your NLP Model
Initiate the training job, and Amazon SageMaker will automatically provision the required resources for model training. Monitor the training process through the SageMaker console, and once the model has been trained, SageMaker will store the resulting model artifacts in your specified S3 bucket.
Step 7: Deploy and Evaluate
Deploy your trained NLP model as an endpoint in SageMaker. Test the endpoint with new data to evaluate its performance. Fine-tune the model if necessary, repeating the training and evaluation process until you achieve the desired accuracy.
Conclusion
In wrapping up this guide, we've learned to harness the simplicity of Labellerr for text, data, and image annotation, seamlessly transitioning to AWS SageMaker for training. Now that you have these resources at your disposal, you are prepared to handle the complexities of NLP. Recall that this is only the start; carry on researching, testing, and developing your concepts into effective, practical implementations. The field of NLP is dynamic, and if you have the correct tools, you may go on an exciting path full of opportunities for creativity and invention.

Simplify Your Data Annotation Workflow With Proven Strategies
.png)
