

ML Beginner's Guide To Build Driver Drowsiness Detection Model

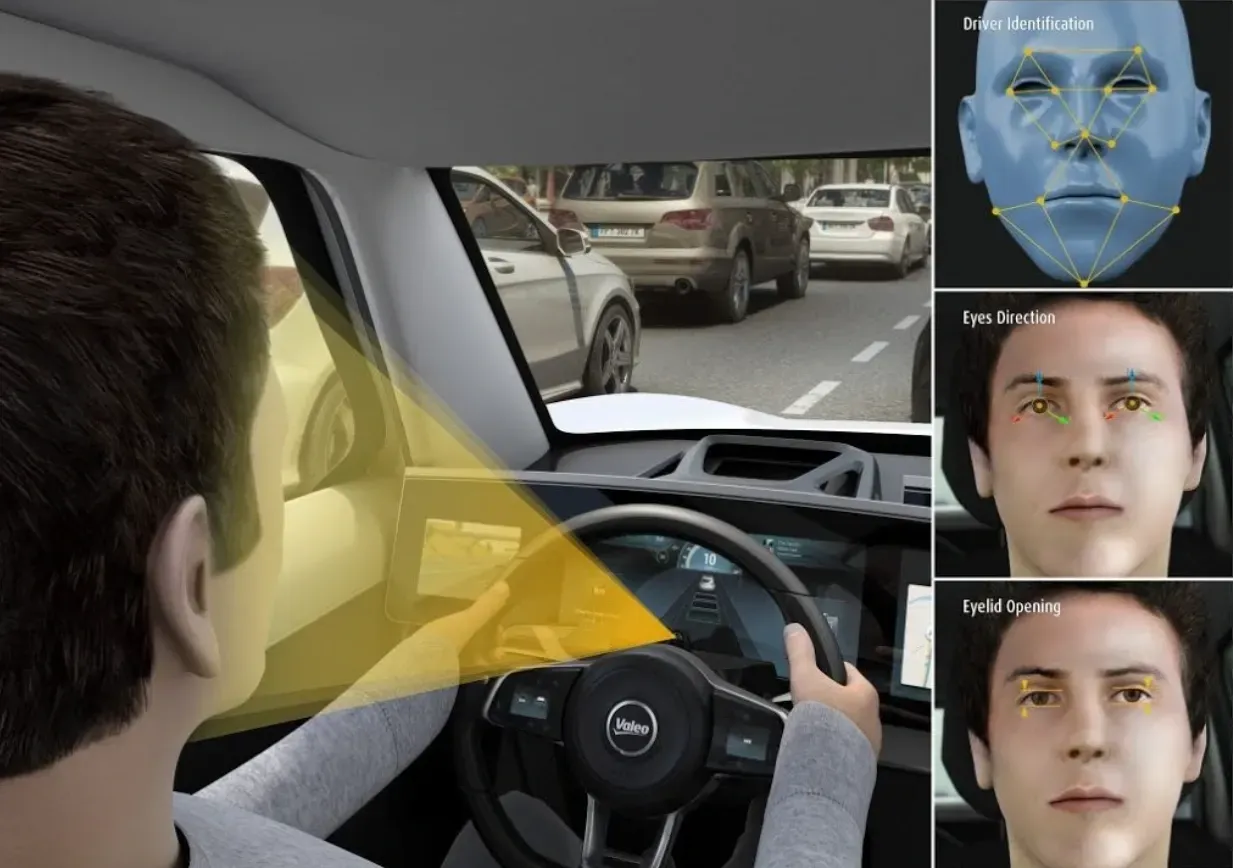
Table of Contents
- Introduction
- Prerequisites
- Hands-on Tutorial
- Role in Automotive Safety
- Conclusion
- Frequently Asked Questions
Introduction
Imagine driving for a long time on a never-ending road. The engine's constant sound makes you feel sleepy. This is a common situation for many drivers. Did you know that lots of accidents happen because drivers feel too tired? It's a serious problem.
Drowsy driving isn't just feeling tired; it causes a lot of crashes around the world. That's why we need new technology to help drivers stay alert.
In this tutorial, we're using a special kind of computer program in Python. It uses cameras and clever software called OpenCV and Dlib. With these tools, we can spot small signs that someone might be getting too tired while driving.
Envisage if our cars could tell when we're not paying attention and warn us before something bad happens. This tutorial helps us make driving safer by using smart technology to stop accidents caused by tiredness.
Prerequisites
Python
All the below code will be written using Python.
OpenCV (cv2)
Handles live video capture and frame manipulation, aiding in facial data collection and visualization of drowsiness status through text overlays.
NumPy (np)
Computes distances between facial landmarks, a crucial step in assessing blink intensity, a key indicator of driver drowsiness.
Dlib
Facilitates face detection and precise landmark localization, allowing for the identification of specific facial features like eyes, essential in evaluating blink patterns.
Imutils (from imutils import face_utils)
Simplifies facial landmark handling and conversion for efficient analysis, assisting in the interpretation of detected facial features in drowsiness assessment.
#Importing OpenCV Library for basic image processing functions
import cv2
# Numpy for array related functions
import numpy as np
# Dlib for deep learning based Modules and face landmark detection
import dlib
#face_utils for basic operations of conversion
from imutils import face_utils
These libraries play vital roles in various aspects of drowsiness detection, from video processing to numerical calculations and precise facial landmark analysis, collectively aiding in evaluating driver alertness.
Hands-on Tutorial
1. Initializing Camera and Detectors
The code begins by initializing essential components: the camera for capturing the driver's face and detectors to identify facial features. The cv2.VideoCapture method configures the camera to capture live video frames.
Concurrently, the dlib.get_frontal_face_detector sets up a face detector, while the dlib.shape_predictor initializes a predictor to identify 68 facial landmarks.
These landmarks are pivotal as they enable the program to identify specific facial regions like eyes and mouth.
#Initializing the camera and taking the instance
cap = cv2.VideoCapture(0)

#Initializing the face detector and landmark detector
detector = dlib.get_frontal_face_detector()
predictor = dlib.shape_predictor("shape_predictor_68_face_landmarks.dat")
2. Defining Helper Functions
Two essential functions are defined here: compute and blinked.
The compute function calculates the Euclidean distance between two points in space using NumPy's linear algebra capabilities. This function is crucial for measuring the distance between facial landmarks.
Meanwhile, the blinked function determines the intensity of eye blinks by assessing the ratio of distances between specific facial landmarks. These functions play a key role in evaluating blink patterns, a significant indicator of drowsiness.
#status marking for current state
sleep = 0
drowsy = 0
active = 0
status=""
color=(0,0,0)

def compute(ptA,ptB):
	dist = np.linalg.norm(ptA - ptB)
	return dist

def blinked(a,b,c,d,e,f):
	up = compute(b,d) + compute(c,e)
	down = compute(a,f)
	ratio = up/(2.0*down)

	#Checking if it is blinked
	if(ratio>0.25):
		return 2
	elif(ratio>0.21 and ratio<=0.25):
		return 1
	else:
		return 0
3. Main Loop for Drowsiness Detection
The central loop within the code captures frames from the camera in real time. It converts these frames into grayscale to simplify subsequent operations. Utilizing the face detector from Dlib, it identifies faces within the grayscale frames.
For each detected face, the code proceeds to extract facial landmarks using the shape predictor. These landmarks serve as data points to evaluate the blink intensity in the subsequent steps.
while True:
    _, frame = cap.read()
    gray = cv2.cvtColor(frame, cv2.COLOR_BGR2GRAY)

    faces = detector(gray)
    #detected face in faces array
    for face in faces:
        x1 = face.left()
        y1 = face.top()
        x2 = face.right()
        y2 = face.bottom()

        face_frame = frame.copy()
        cv2.rectangle(face_frame, (x1, y1), (x2, y2), (0, 255, 0), 2)

        landmarks = predictor(gray, face)
        landmarks = face_utils.shape_to_np(landmarks)
4. Face Detection and Landmark Extraction
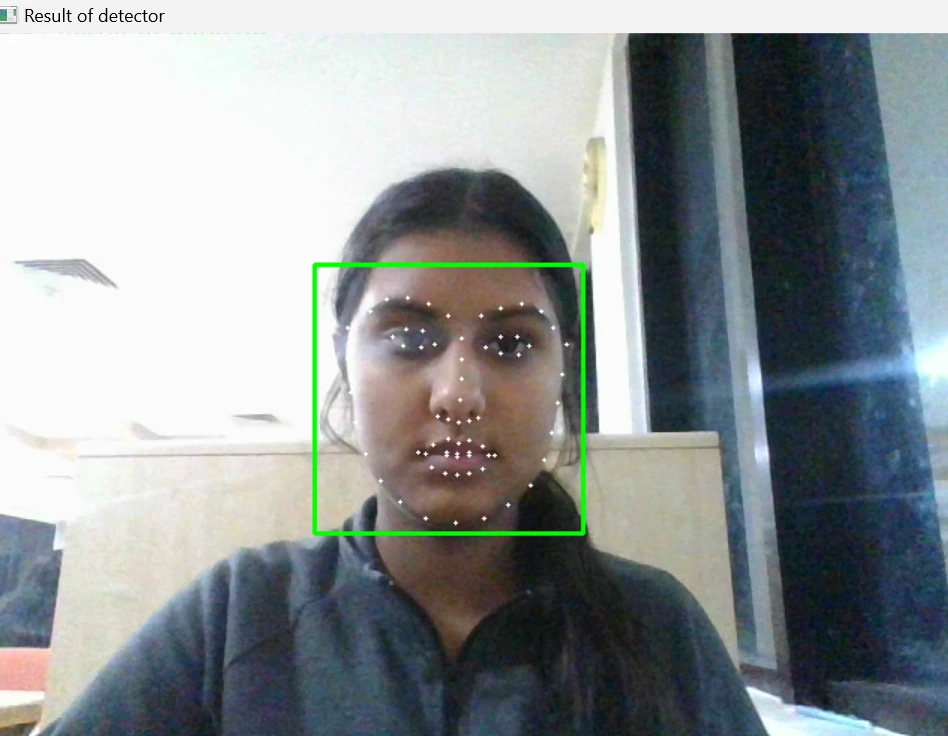
After detecting faces, the code extracts facial landmarks. Each face detected by the face detector has 68 landmarks identified, such as the corners of the eyes, nose, and mouth. These landmarks are crucial as they help in assessing blink intensity and determining the driver's drowsiness level based on their eye movement patterns.
 landmarks = predictor(gray, face)
        landmarks = face_utils.shape_to_np(landmarks)

        #The numbers are actually the landmarks which will show eye
        left_blink = blinked(landmarks[36],landmarks[37],
        	landmarks[38], landmarks[41], landmarks[40], landmarks[39])
        right_blink = blinked(landmarks[42],landmarks[43],
        	landmarks[44], landmarks[47], landmarks[46], landmarks[45])
5. Blink Detection and Drowsiness Classification
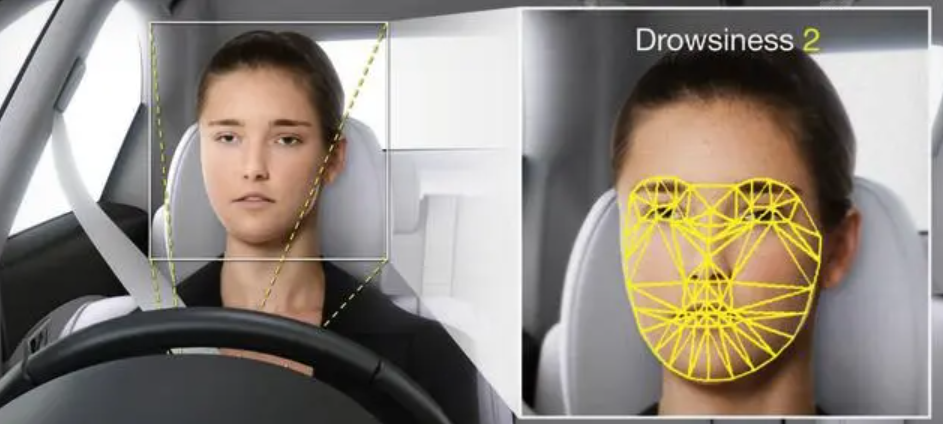
It categorizes the blink intensity into three levels: not blinked, partially blinked, or fully blinked. Based on these blink patterns, the code tracks the driver's state as awake, drowsy, or asleep. It continuously evaluates blink occurrences to determine the driver's level of alertness.
#Now judge what to do for the eye blinks
if(left_blink==0 or right_blink==0):
sleep+=1
drowsy=0
active=0
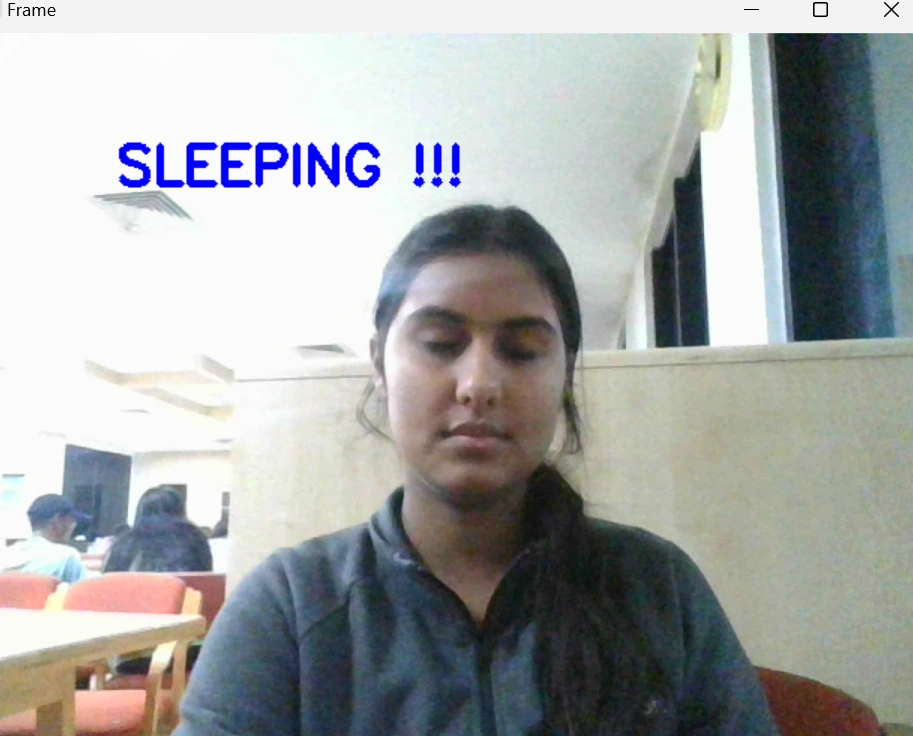
if(sleep>6):
status="SLEEPING !!!"
color = (255,0,0)
elif(left_blink==1 or right_blink==1):
sleep=0
active=0
drowsy+=1
if(drowsy>6):
status="Drowsy !"
color = (0,0,255)
else:
drowsy=0
sleep=0
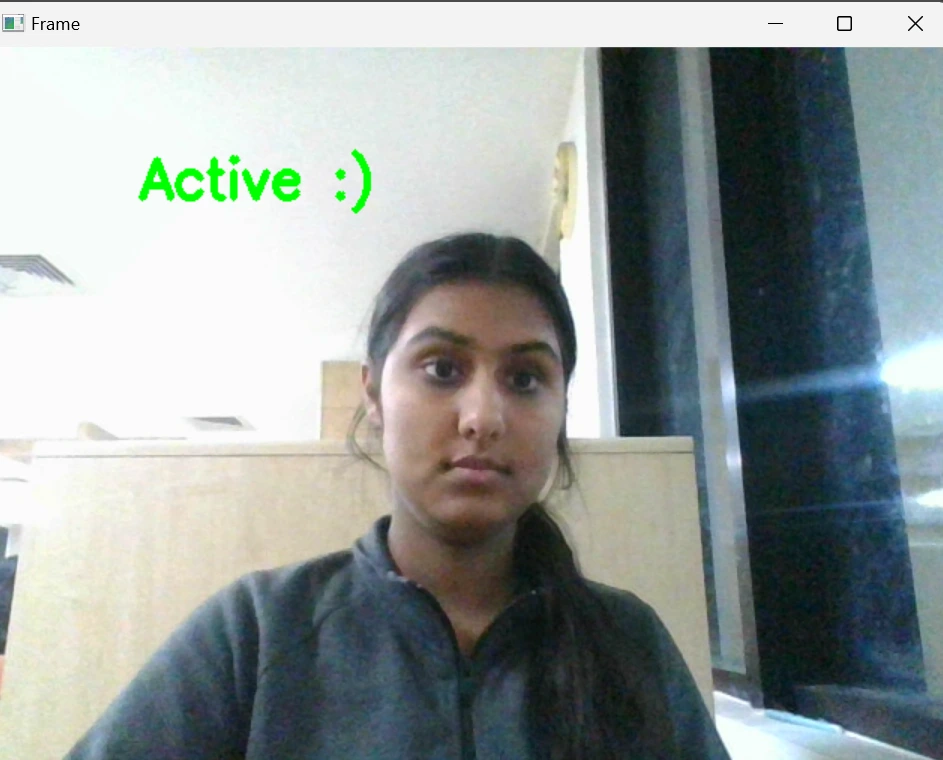
active+=1
if(active>6):
status="Active :)"
color = (0,255,0)6. Displaying Results
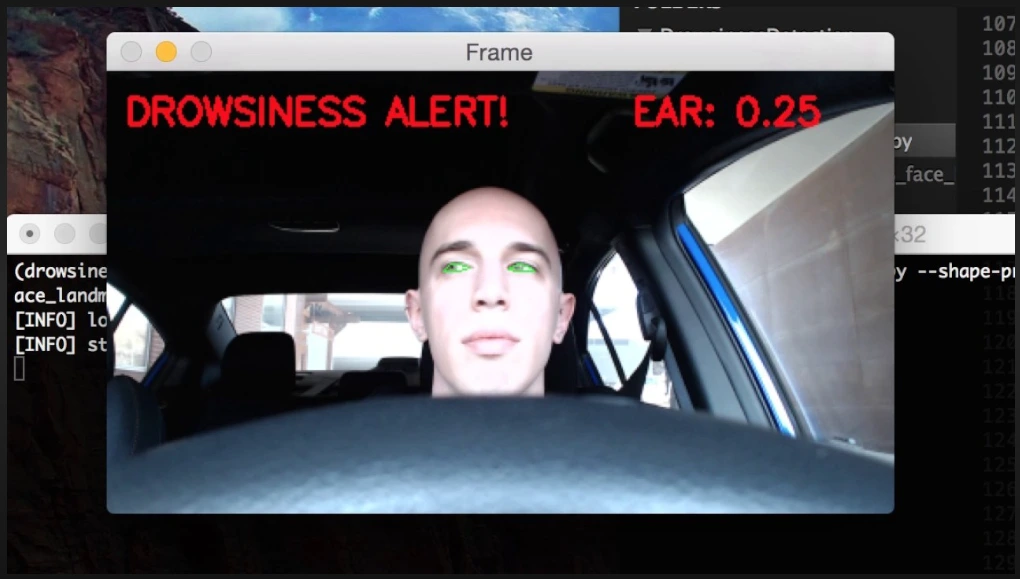
Finally, the code visually presents the detected results on the frames captured by the camera.It overlays the driver's state (awake, drowsy, or asleep) onto the frames using OpenCV's cv2.putText function.
Additionally, it marks the facial landmarks for visualization purposes, aiding in the understanding of the detection process.
   cv2.putText(frame, status, (100,100), cv2.FONT_HERSHEY_SIMPLEX, 1.2, color,3)

        for n in range(0, 68):
        	(x,y) = landmarks[n]
        	cv2.circle(face_frame, (x, y), 1, (255, 255, 255), -1)

    cv2.imshow("Frame", frame)
    cv2.imshow("Result of detector", face_frame)
    key = cv2.waitKey(1)
    if key == 27:
      	break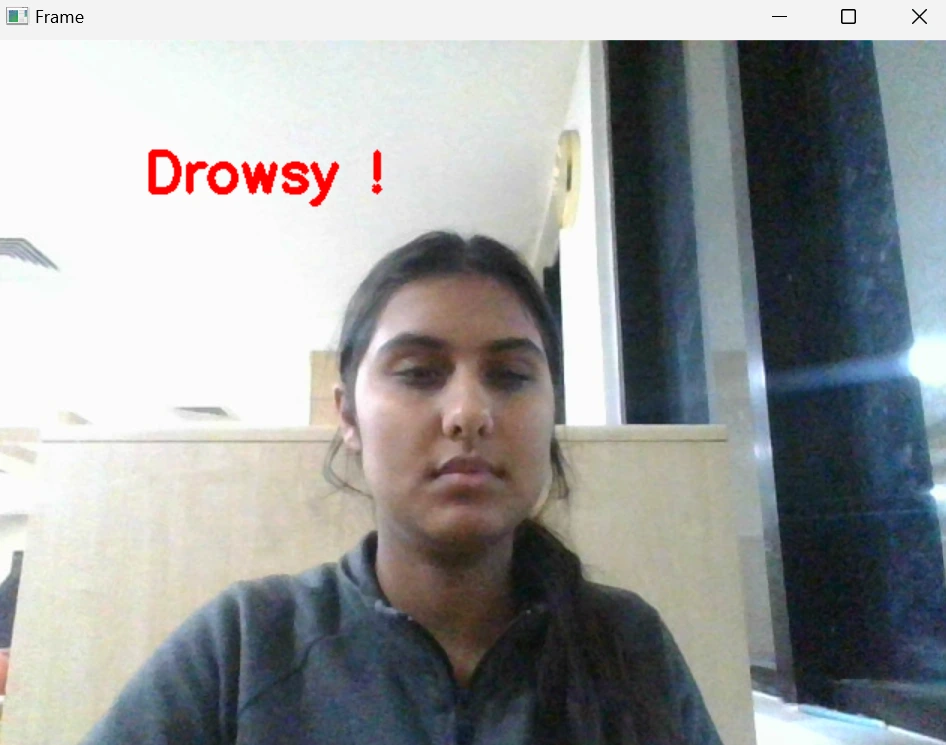
Role in Automotive Safety
(i) Accident Prevention
Timely detection of drowsiness helps prevent accidents caused by driver fatigue.
(ii) Enhancing Safety Measures
Real-time monitoring ensures drivers remain attentive, thereby reducing the risk of collisions.
(iii) Integration into Driver Assistance Systems
These systems can be integrated into advanced driver-assistance systems (ADAS) to enhance safety features in modern vehicles.
Conclusion
In this tutorial, we explored drowsiness detection using facial landmarks and Python. Implementing this code means safer driving, especially in the automotive sector. With OpenCV for video processing and Dlib for facial recognition, identifying driver drowsiness becomes accurate.
This holds promise for improved road safety by enabling early alerts for potential accidents caused by driver fatigue. This technology's integration into advanced driver-assistance systems signals a future where vehicles actively ensure our safety, reshaping automotive safety measures toward safer roads.
Frequently Asked Questions
1.How to detect drowsiness in a car?
Detecting driver drowsiness in a car involves using various sensors and technologies like computer vision cameras to monitor facial movements, eye behavior, blinking patterns, and head position.
It also includes analyzing steering patterns, heart rate, and skin conductance to identify signs of fatigue. Advanced systems employ machine learning algorithms to assess driving behavior and issue warnings or alerts when drowsiness is detected. These measures aim to prevent accidents by alerting drivers or activating safety protocols, ensuring safer roads for everyone.
2. How does a driver drowsiness detection system work?
A driver drowsiness detection system utilizes a trained model during the testing phase to assess the level of the driver's drowsiness. If necessary, the system takes action, such as triggering an alarm or notifying the driver to take a break.
The flow of data in driver drowsiness detection systems involves evaluating different metrics to gauge the system's efficacy in detecting drowsy individuals.
3. What causes drowsy driving?
Drowsy driving can occur due to extended periods of driving without sufficient sleep or when driving during typical sleep hours for the driver. In such scenarios, the primary issue is the lack of concentration in drowsy drivers, leading to delayed reactions to road events.
Looking for high quality training data to train your driver drowsiness detection Model? Talk to our team to get a tool demo.

Simplify Your Data Annotation Workflow With Proven Strategies
.png)
